- Create a whop app on the dashboard and get your api keys.
- Setup your development environment
- Build your app view page. Either experience view or dashboard view.
- Deploy to production
- Apply to discover
Create your Whop app.
Go to your company dashboard
Navigate to the developer page.
Find the app section underneath webhooks
You cannot change the company that your app is built in later.
Setup your development environment
You can build whop apps in any programming language and framework. Our SDKs are currently available in Javascript / Typescript, Python, Ruby and Go (coming soon) If you are new, the easiest way to get started is to use our NextJS template.Setup your SDK
-
Paste your environment variables from above into a
.env.development.localfile in your project. -
Initialize the Whop SDK with the environment variables and export it so it can be reused throughout your app.
This is already done in the NextJS template. Find it at
./lib/whop-sdk.ts
Start your development server
You need to run your dev server through the whop dev proxy. This is the default behaviour in the NextJS template. Learn more
Configure your app views
The app view determines the initial path that is opened when your app is loaded in the whop UI.If you are building a consumer focussed app for other Whop’s to give to their users, ensure your “Experience View” is set to 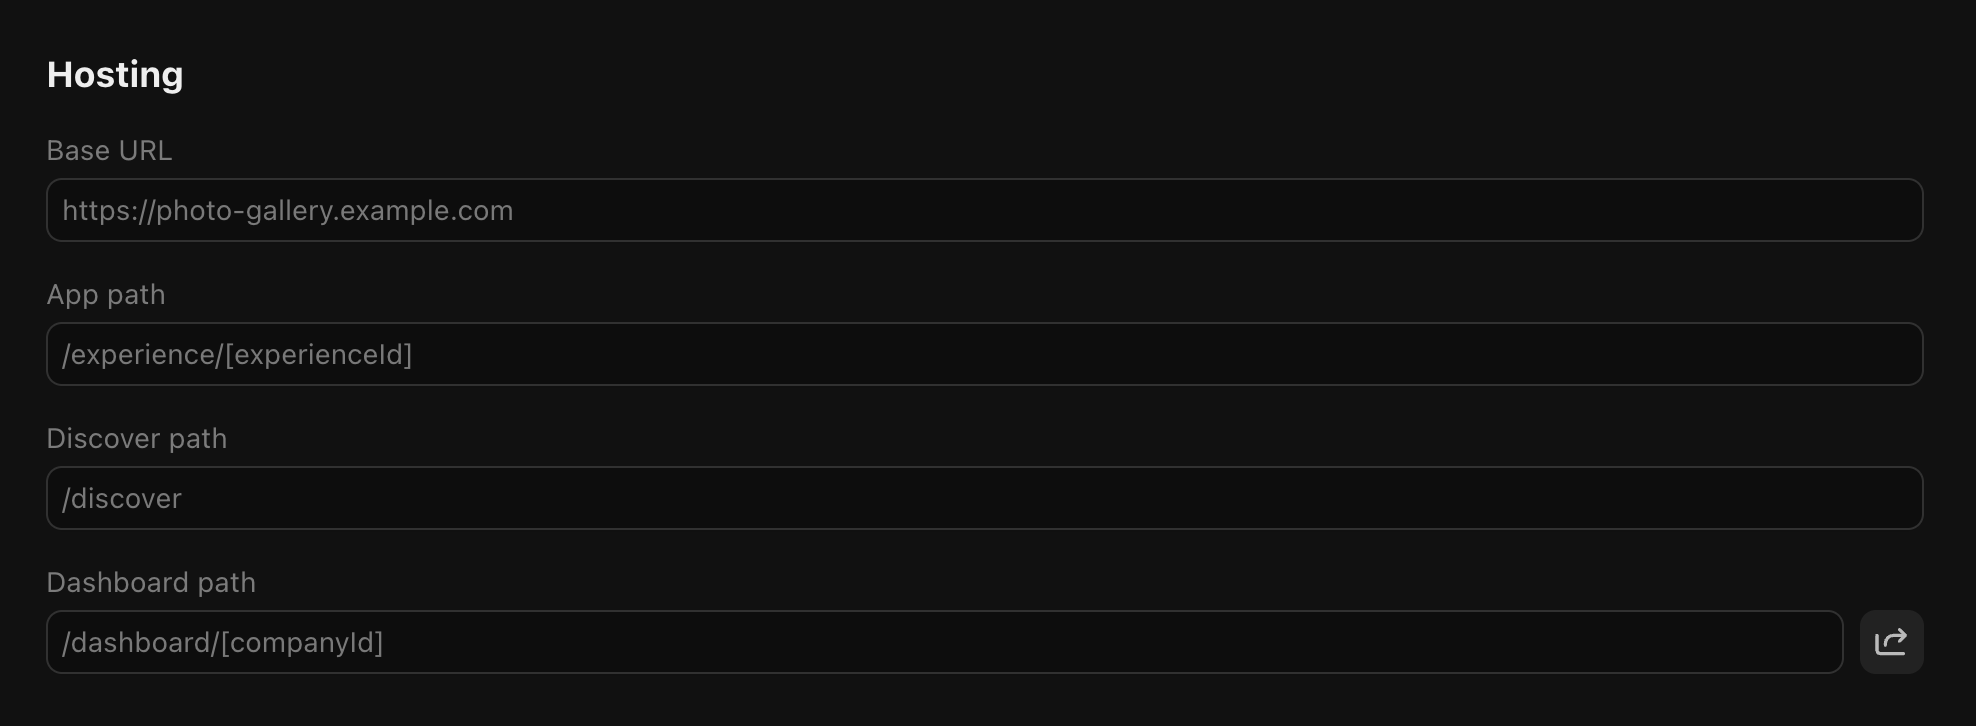
/experiences/[experienceId]. (This is the default)If you are building a dashboard app for business owners, remove the “App View” and set the “Dashboard View” to /dashboard/[companyId]Configure this in the “Hosting” section in your App Details tab in the App Dashboard
Install your whop app
Visit your install link (which can be found on your app details page)
and install your app into your whop.
Enable development mode
The current page you’re on will now show an error, as your app is missing the
Base Url for production use.For now, enable Localhost mode using the development mode setting overlay in the app frame.
This will load the app that’s running on localhost in your setup.If you are building using an online AI coding platform, directly set the
Base URL
to the URL provided by the platform. In this case, you don’t need “Localhost” mode.You should now see your local development environment live inside whop.
Build your app
You are now ready to start building your app. Get started by looking into./app/experiences/[experienceId]/page.tsx
or ./app/dashboard/[companyId]/page.tsx if you’re building a dashboard app.
If you are building in a different framework create these files, such that your server responds to
GET /experience/exp_123 or GET /dashboard/biz_123Authenticate users and validate access
Authenticate users and validate access
Use the Learn more about authentication
verifyUserToken method to identify who is making requests to your app, then use checkAccess to verify they have permission to view the requested experience or company.Use Frosted UI for beautiful components
Use Frosted UI for beautiful components
Frosted UI provides pre-built components that automatically adapt to light and dark mode, matching the native Whop design system for a polished, professional look.Learn more about Frosted UI
Accept payments in your app
Accept payments in your app
Create checkout sessions and accept payments directly in your app using the Whop payment APIs. Handle one-time payments, subscriptions, and more with low fees.Learn more about payments
Setup webhooks to respond to events
Setup webhooks to respond to events
Listen to events like new memberships, cancellations, and payments to keep your app in sync with Whop. Webhooks are sent in real-time to your server.Learn more about webhooks
Deploy to production
Once you are happy with your app locally, deploy your app to a publicly accessible hostname. Popular options are Vercel, Railway or Cloudflare Pages.Set your environment variables on your hosting provider
Copy the environment variables from your app dashboard, as you did for the local setup.
Set the base url in the app dashboard
Once your app is deployed, copy the deployment url and paste it into the 
Base Url field in your app dashboard.Troubleshooting
Server actions don't work when deployed on vercel
Server actions don't work when deployed on vercel
Ensure you use the
withWhopAppConfig wrapper in your next.config.mjs file.Apply to discover
Apply to discover to have your app listed on the Whop app store.You don’t need to be listed on the app store in order to use your app.You can always share your install link directly or link to from your website.
Complete your branding
- Ensure your app has an Icon, short description and good name. (App Details tab)
- Select your app store category.
- Add a short 10-20 second video showcasing how your app is used. (Discover tab)
- Add 2-3 further screenshots of your app.
- Write an app store description that highlights what your app does and how it will benefit creators.
You can preview your app store listing page at
https://whop.com/apps/<app_xxxxxx>.Submit for review
Click on the “Publish to App Store” button. Whop will review your app.To ensure that your app passes review ensure the following criteria are met:
- Your app works end to end, in production on any whop account without bugs.
- Your app uses the provided whop authentication and doesn’t ask users to sign in again.
- Your app isn’t purely a redirect to an external platform.
- Your app does NOT ask for permissions it doesn’t need to function.
- Your app is polished and looks good in both light and dark mode (switch between both in the bottom right on whop). ProTip: Use FrostedUI
- Your app delivers a clear creator-facing benefit or solves a specific problem.
- Your app delivers a measurable useful outcome (not just a demo or concept).
- Your app has no placeholder elements (all features are complete and functional).
- Members do not have access to admin details or settings (proper access control is implemented).