Required vs optional permissions
You can mark each permission as required or optional. The choice changes the install experience for creators.
Optional permissions are good for opt-in functionality. If a creator declines an optional permission, your app should still work, just without that feature.
Set up permissions
1
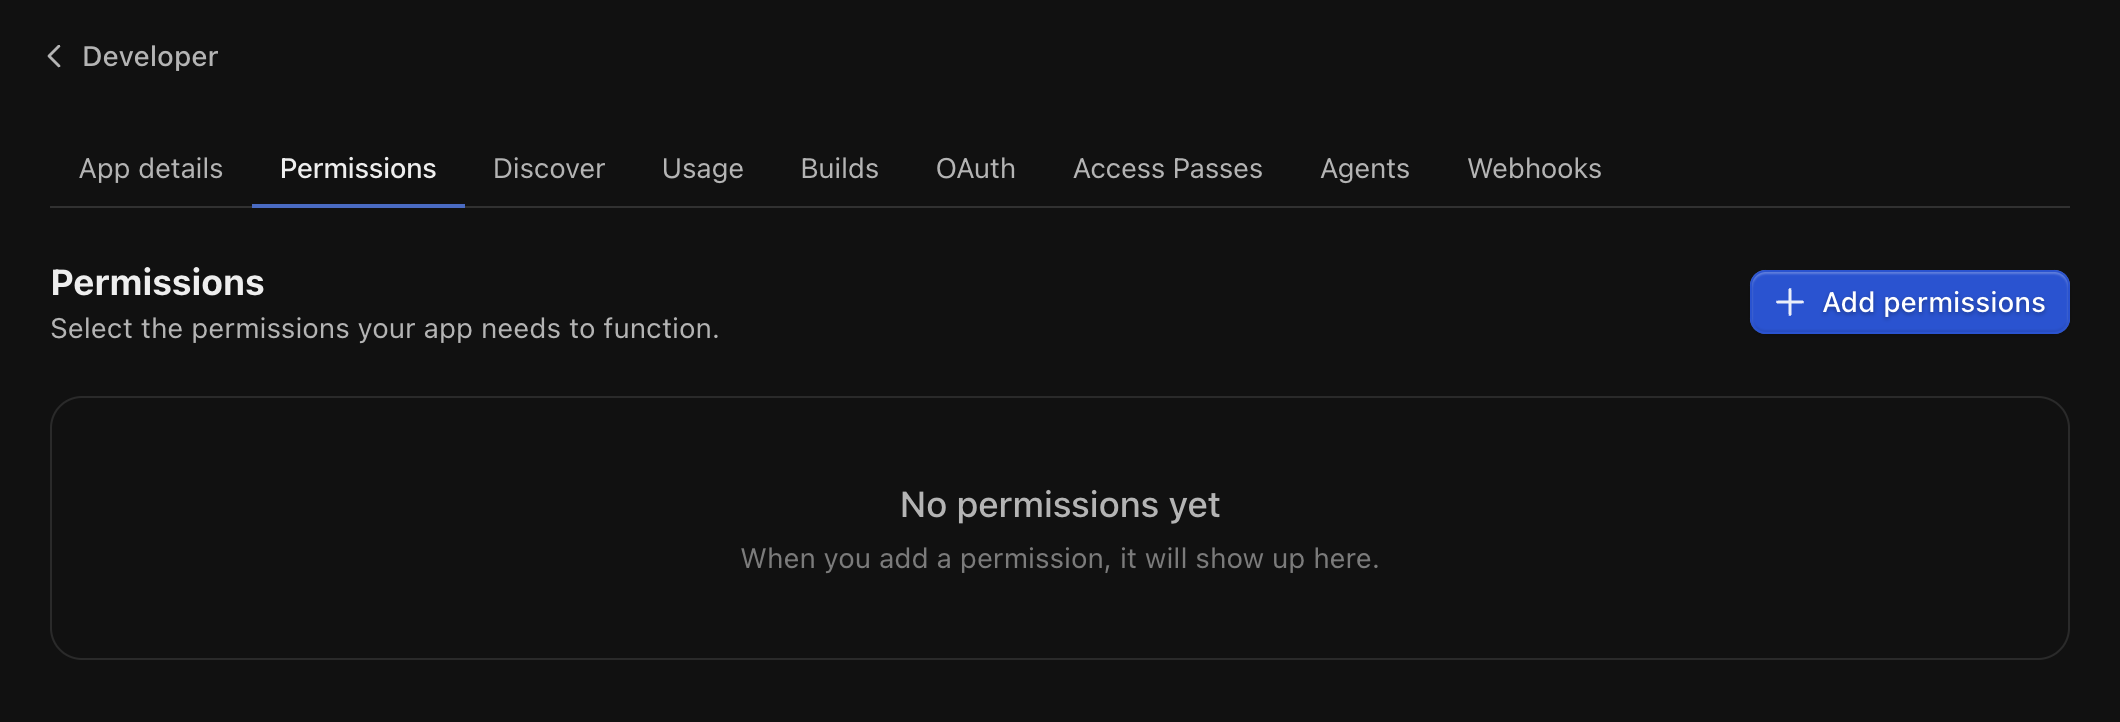
Open your app's permissions tab
- Go to the Developer dashboard.
- Select or create an app.
- Click the Permissions tab.
2
Add the permissions you need
Click Add permissions, select what your app needs, and confirm.Cross-reference the API endpoints you plan to call and add every permission they require.
3
Configure each permission
For each one: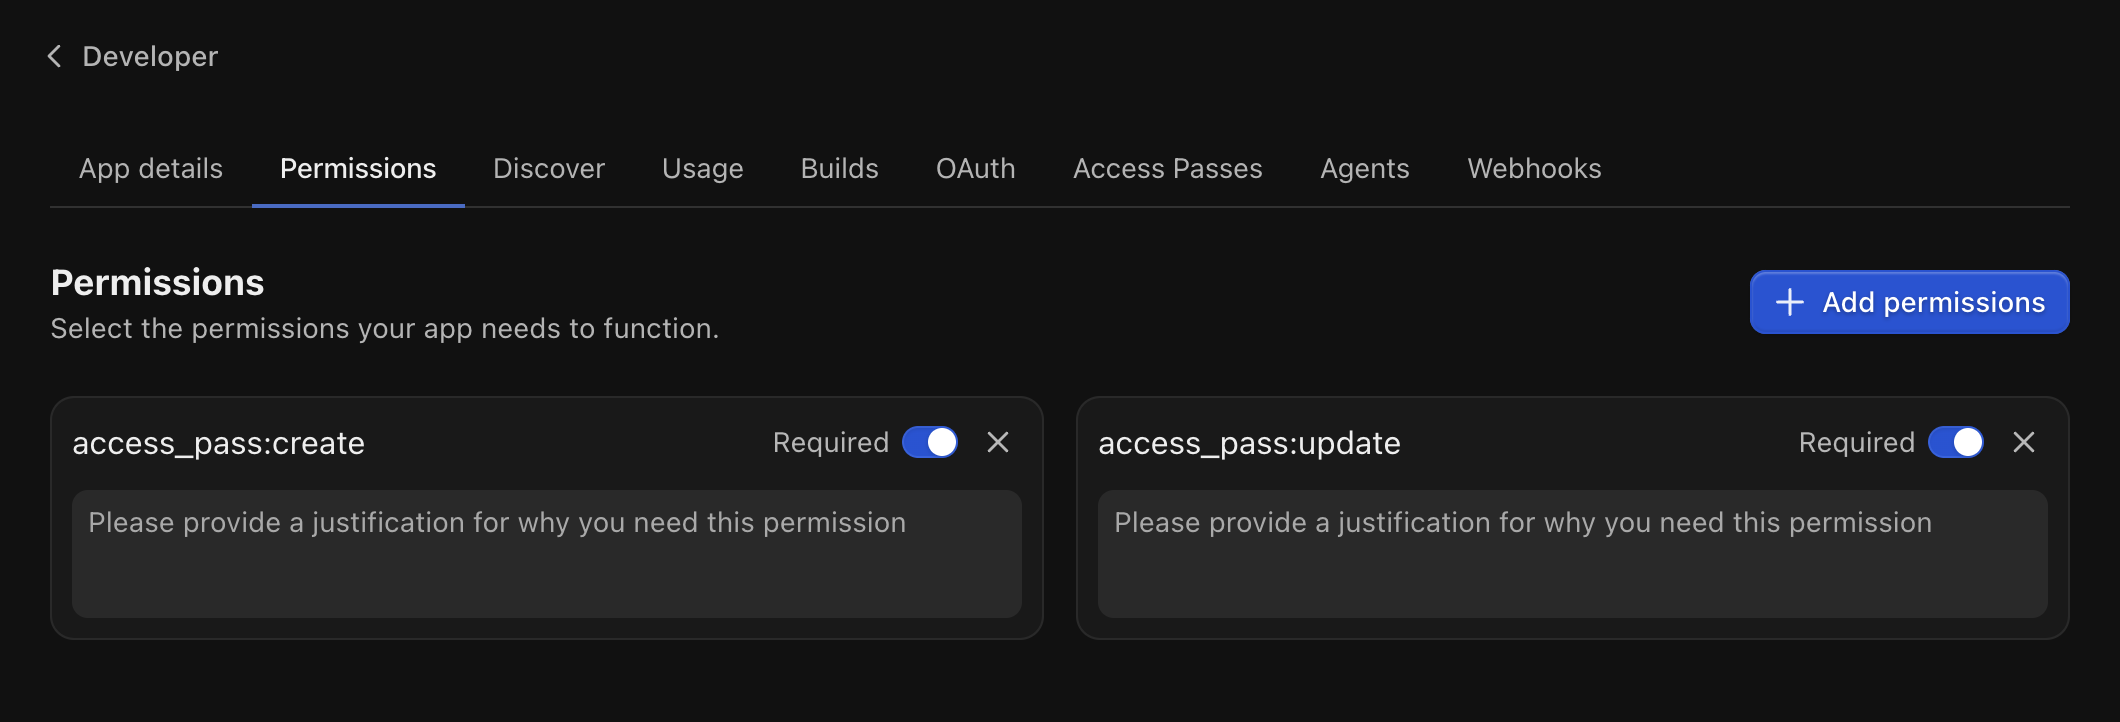
- Write a short justification explaining why the app needs it. Creators see this at install.
- Mark it required or optional.
4
Save

5
Install on a test company
Visit your direct install link: 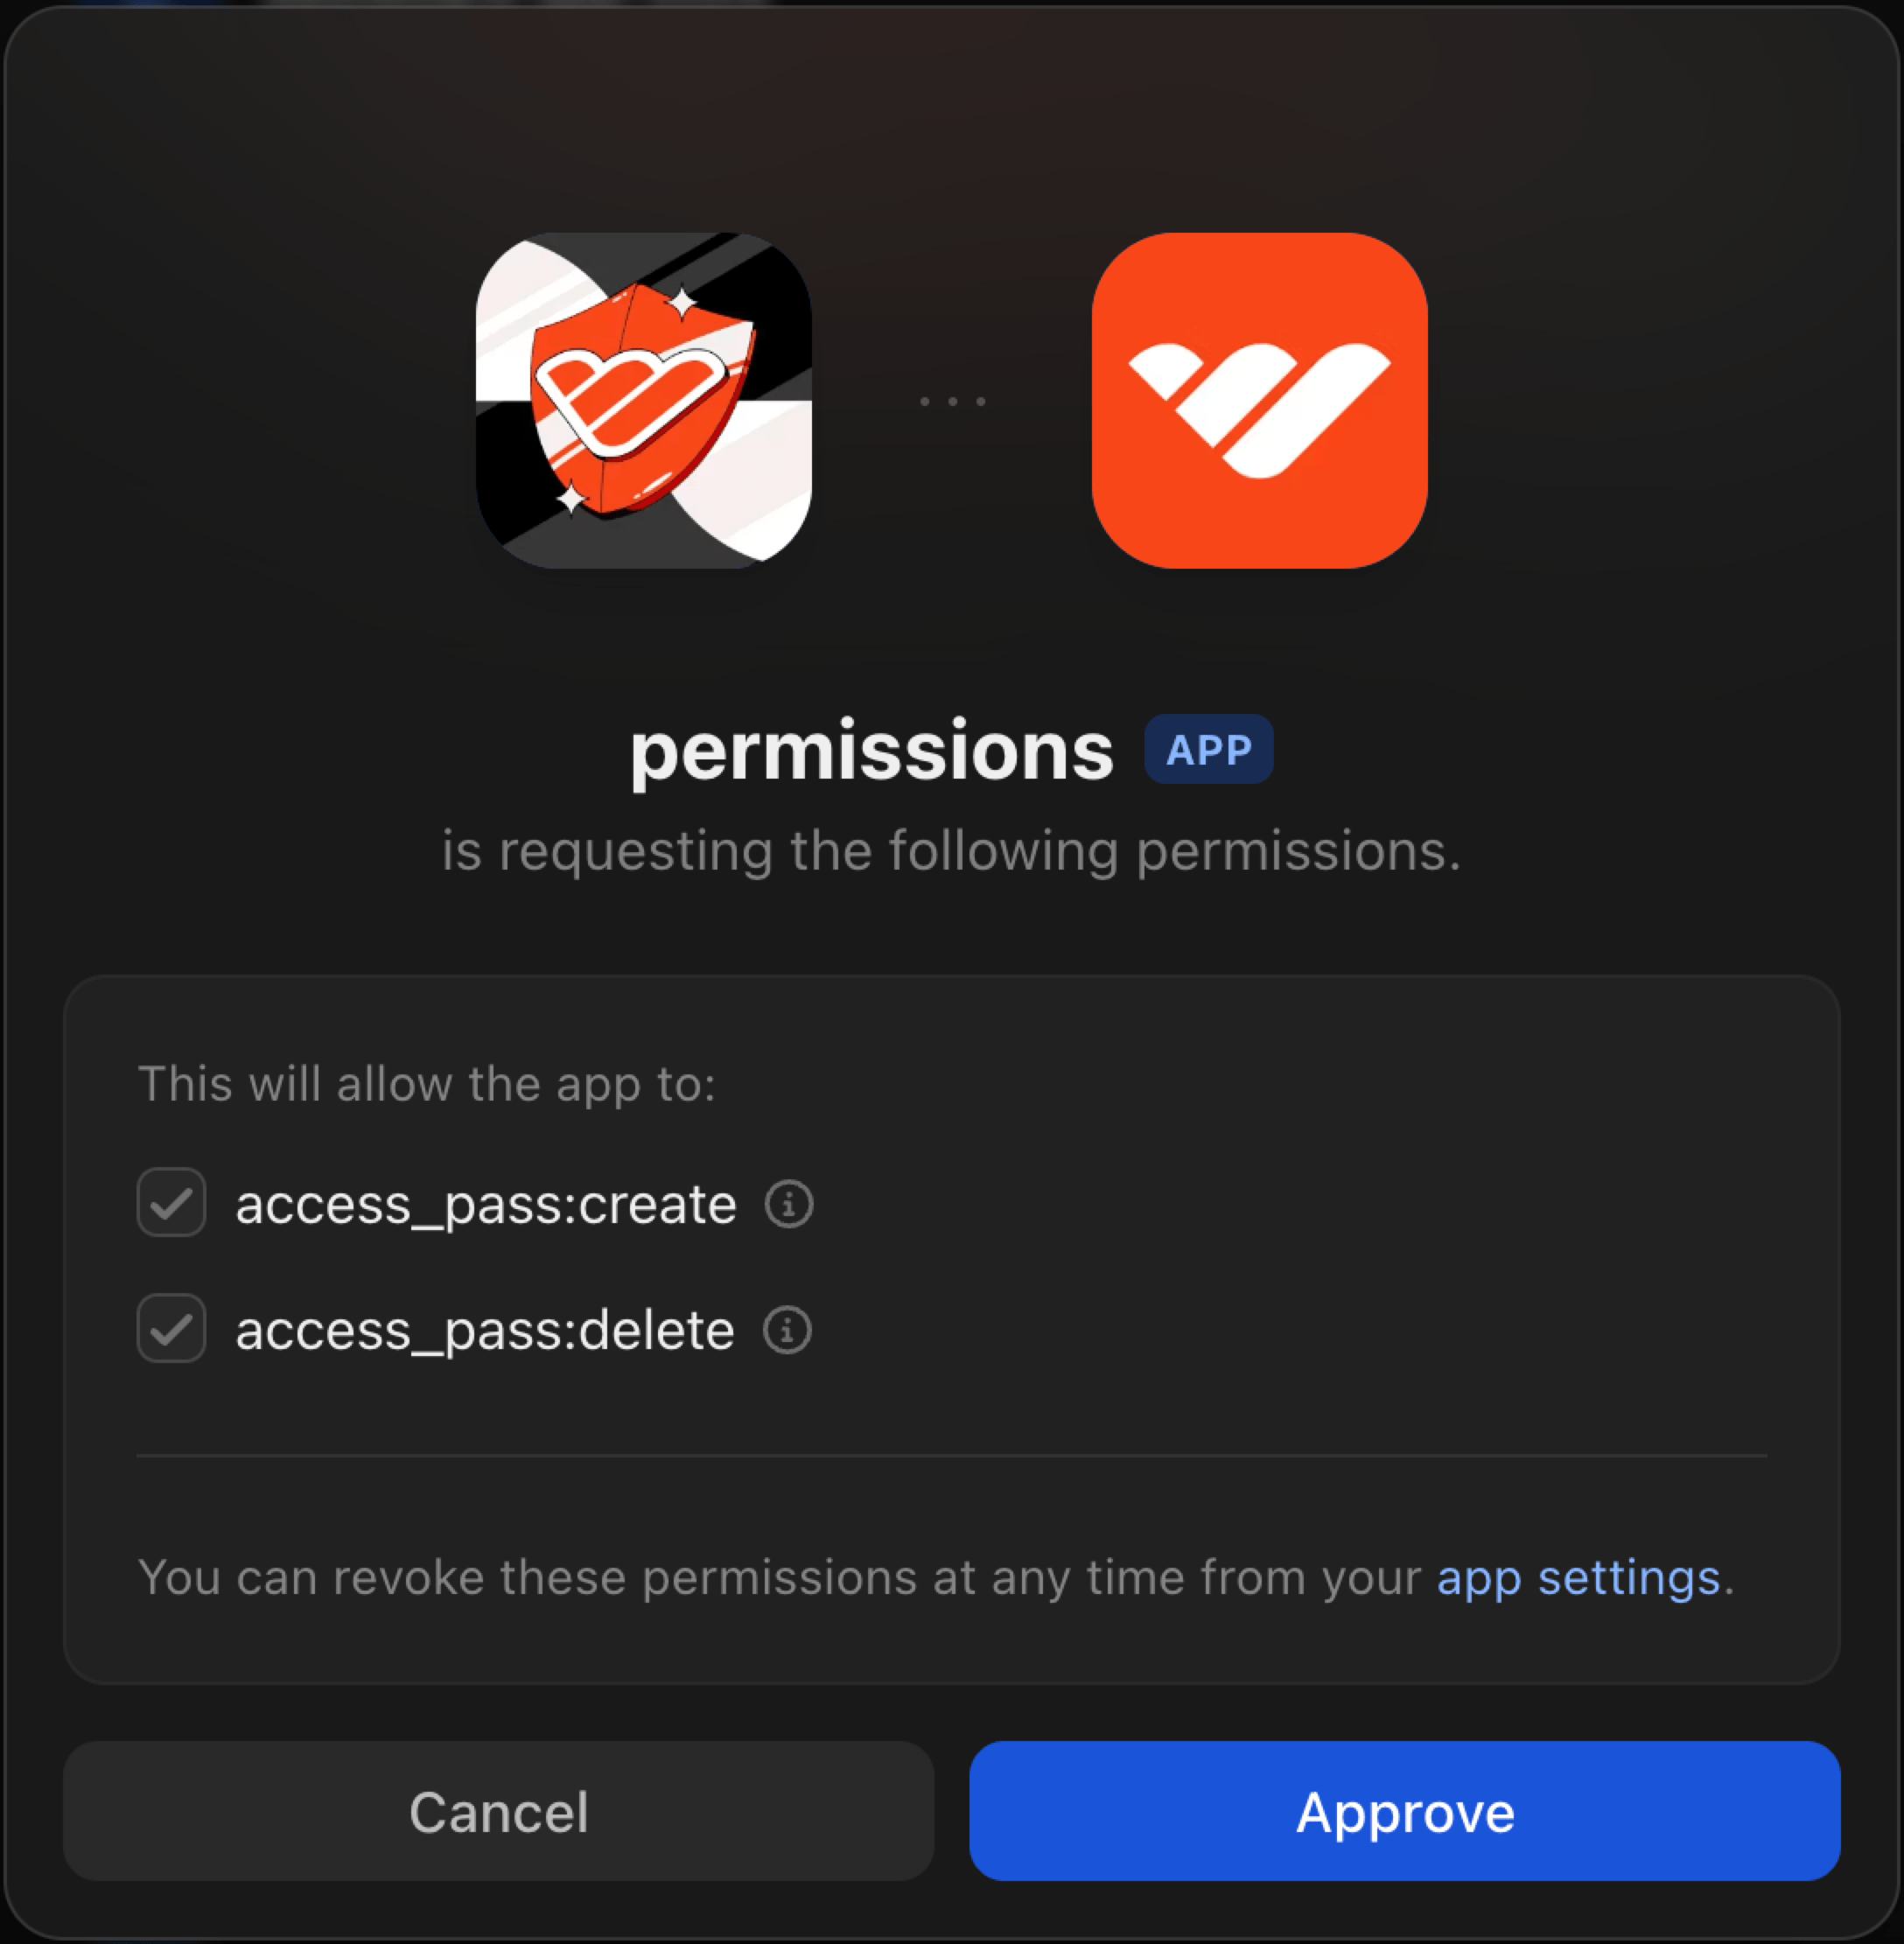
https://whop.com/apps/app_xxxxxxxxx/install.Pick a company, review the permission prompt, and approve.Update permissions later
Permissions can change as the app evolves. When you add a new one:- Existing installs see a Re-approve button next to your app.
- API calls that need the new permission fail until each creator re-approves.
When you add a permission, re-approve on your own test company too. New scopes don’t carry over until you accept them in Authorized apps.
Dashboard → Settings → Authorized apps.
FAQ
How many permissions can I request?
How many permissions can I request?
Up to 100 per app.
How do I find the right permissions for an endpoint?
How do I find the right permissions for an endpoint?
Each endpoint in the API reference lists its required permissions inline.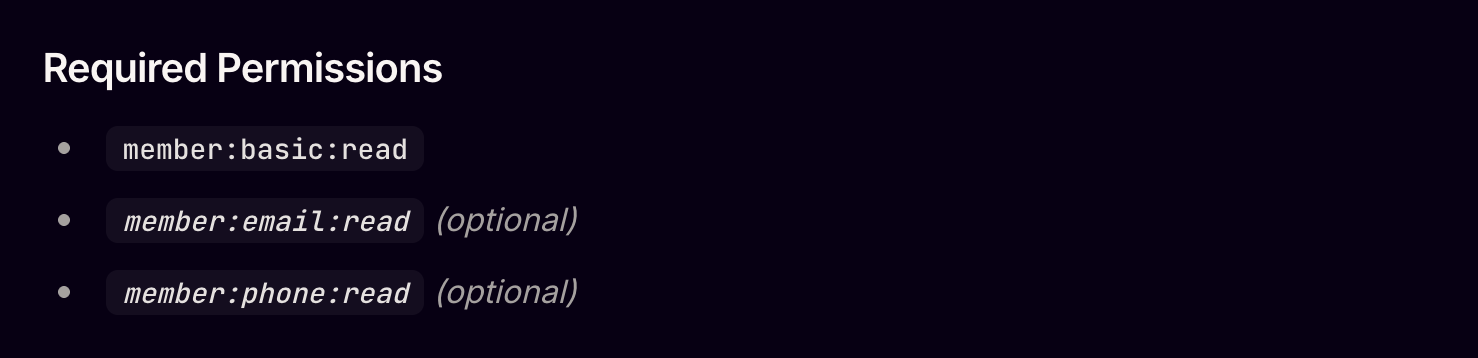
Can I request additional permissions afterwards?
Can I request additional permissions afterwards?
Yes. You can request additional permissions and the creator will be asked to re-approve them.
Keep in mind that until the permissions are re-approved, API requests requiring the newly requested permissions will fail. Make sure to handle these errors gracefully in your code.
Next steps
Authentication
Verify the user behind a request and check their access level.
Listen to webhooks
Receive payment, membership, and entry events. Webhooks need their own
webhook_receive:* scopes.Build app views
Set up dashboard views, experiences, and discover listings.
Run a local dev proxy
Match the production iframe + cookie setup on localhost.