> ## Documentation Index
> Fetch the complete documentation index at: https://docs.whop.com/llms.txt
> Use this file to discover all available pages before exploring further.
# React Native
> Build cross-platform mobile and web apps for Whop using React Native.
Build native iOS, Android, and web experiences for Whop using a single React Native codebase. Your apps run directly inside the Whop mobile app and can access native platform features.
## How it Works
Whop React Native apps are embedded experiences that run on multiple platforms:
* **Mobile (iOS/Android)**: Apps run natively inside the Whop mobile app with full platform integration
* **Web**: Apps run in the browser with automatic fallbacks for platform-specific features
* **Universal Code**: Write once, deploy everywhere with platform-specific optimizations
Your app receives authenticated user context and can make API calls through the Whop SDK. The build system automatically handles platform-specific bundling using Metro for mobile and esbuild for web.
***
## Getting Started
### System Requirements
Before you begin, make sure your system meets the following requirements:
* [Node.js 22](https://nodejs.org/) or later
* [pnpm 9.15](https://pnpm.io/) or later
To check, run `node -v` and `pnpm -v`.
### Create Your App
Create a new Whop React Native app using the CLI:
```bash theme={null}
pnpm create @whop/react-native@latest
```
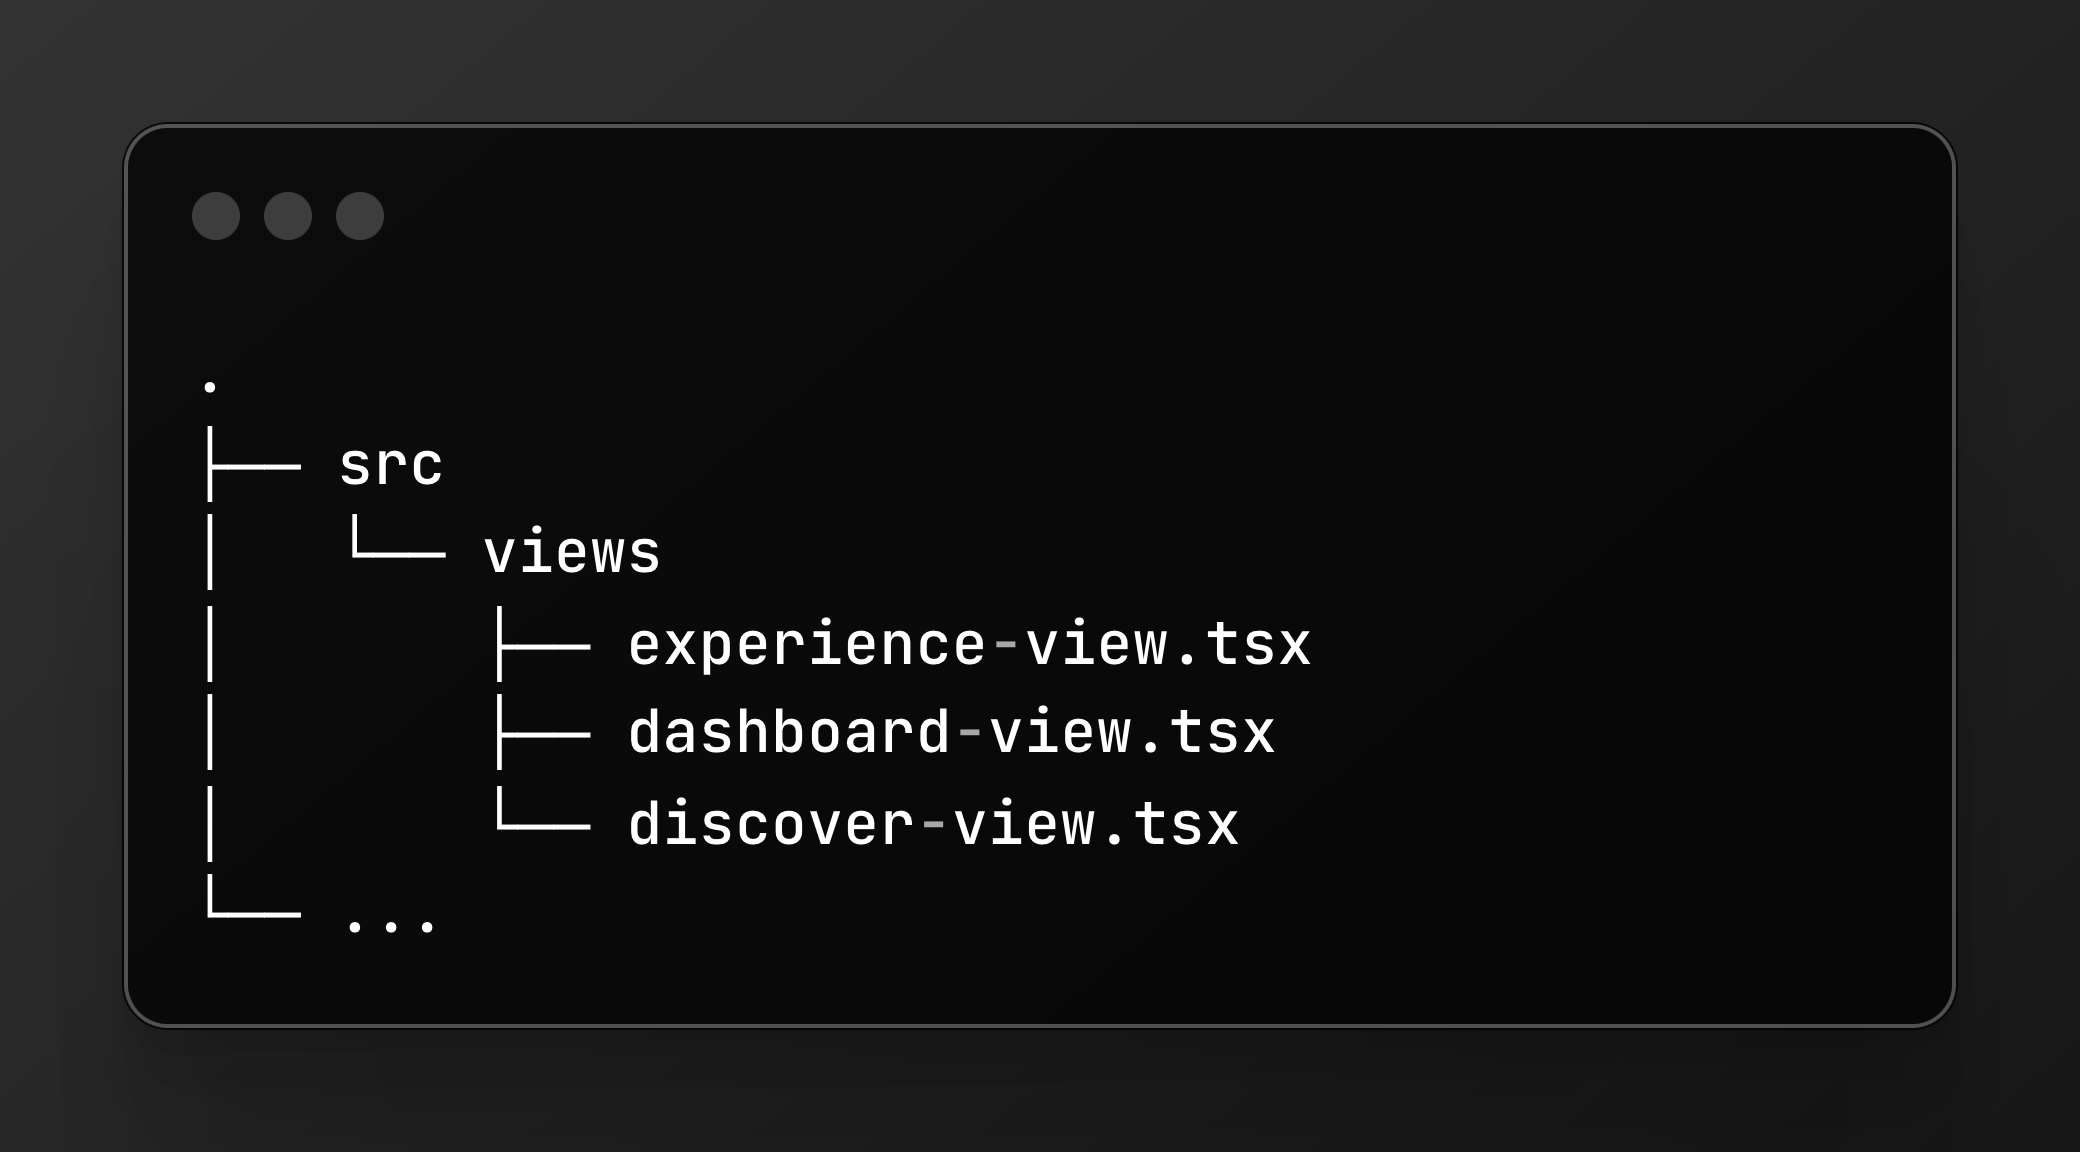
This sets up a new project with the following structure:
```
my-app/
├── src/
│ └── views/
│ ├── experience-view.tsx # Experience view
│ ├── dashboard-view.tsx # Company dashboard view
│ └── discover-view.tsx # Discovery/marketplace view (optional)
├── .env.local # Environment variables
├── package.json
└── babel.config.js
```
### Configure Environment Variables
Create a `.env.local` file in the root directory:
```env theme={null}
WHOP_API_KEY=your_api_key
NEXT_PUBLIC_WHOP_APP_ID=your_app_id
NEXT_PUBLIC_WHOP_AGENT_USER_ID=your_agent_user_id
NEXT_PUBLIC_WHOP_COMPANY_ID=your_company_id
```
Get these credentials from the [Whop Developer Dashboard](https://whop.com/dashboard/developer):
1. Go to the Whop Developer Dashboard
2. Create a new app or select an existing one
3. Copy the environment variables from the app settings
***
## Views
 Whop apps use different "views" depending on where they're displayed. Each view receives authenticated context as props.
### Experience View
The main view for experience apps. This is where users interact with your app content.
```tsx theme={null}
// src/views/experience-view.tsx
import React from "react";
import { View, Text, ScrollView } from "react-native";
import type { ExperienceViewProps } from "@whop/react-native";
export function ExperienceView(props: ExperienceViewProps) {
const { experienceId, companyId, currentUserId, path, params } = props;
return (
Experience: {experienceId}
User: {currentUserId}
);
}
```
**Props:**
* `experienceId` - The experience ID
* `companyId` - The company that owns this experience
* `currentUserId` - The authenticated user (or `null` if not logged in)
* `path` - Navigation path as array (e.g., `["courses", "123"]`)
* `params` - Query parameters as object
### Dashboard View
For company dashboard integrations where sellers manage their business.
```tsx theme={null}
// src/views/dashboard-view.tsx
import React from "react";
import { View, Text } from "react-native";
import type { DashboardViewProps } from "@whop/react-native";
export function DashboardView(props: DashboardViewProps) {
const { companyId, currentUserId, path, params } = props;
return (
Dashboard for company: {companyId}
);
}
```
**Props:**
* `companyId` - The company ID
* `currentUserId` - The authenticated user
* `path` - Navigation path as array
* `params` - Query parameters
### Discover View (Optional)
For marketplace/discovery experiences where users browse content.
```tsx theme={null}
// src/views/discover-view.tsx
import React from "react";
import type { DiscoverViewProps } from "@whop/react-native";
export function DiscoverView(props: DiscoverViewProps) {
const { currentUserId, path, params } = props;
// Your discovery UI
}
```
***
## Fetching Data
### Using the Whop SDK
This still uses the deprecated SDK - we will update and changes this very soon
to be 10x better!
The Whop SDK is available out of the box for client-side data fetching:
```tsx theme={null}
import { whopSdk } from "@whop/react-native";
import { useQuery } from "@tanstack/react-query";
export function UserProfile() {
const { data: user } = useQuery({
queryKey: ["user"],
queryFn: () => whopSdk.users.getCurrentUser(),
});
return {user?.name};
}
```
We recommend using [TanStack Query](https://tanstack.com/query/latest) for
data fetching as it handles caching, loading states, and refetching
automatically.
Some SDK operations are "server only" and must be called from your API. Check
the [Quickstart](/developer/api/quickstart) for which methods require
server-side execution.
### Making Authenticated API Requests
For server-side operations, create API routes and call them from your React Native app:
Configure your API origin in the [developer dashboard](https://whop.com/dashboard/developer) under "Base URL".
Whop apps use different "views" depending on where they're displayed. Each view receives authenticated context as props.
### Experience View
The main view for experience apps. This is where users interact with your app content.
```tsx theme={null}
// src/views/experience-view.tsx
import React from "react";
import { View, Text, ScrollView } from "react-native";
import type { ExperienceViewProps } from "@whop/react-native";
export function ExperienceView(props: ExperienceViewProps) {
const { experienceId, companyId, currentUserId, path, params } = props;
return (
Experience: {experienceId}
User: {currentUserId}
);
}
```
**Props:**
* `experienceId` - The experience ID
* `companyId` - The company that owns this experience
* `currentUserId` - The authenticated user (or `null` if not logged in)
* `path` - Navigation path as array (e.g., `["courses", "123"]`)
* `params` - Query parameters as object
### Dashboard View
For company dashboard integrations where sellers manage their business.
```tsx theme={null}
// src/views/dashboard-view.tsx
import React from "react";
import { View, Text } from "react-native";
import type { DashboardViewProps } from "@whop/react-native";
export function DashboardView(props: DashboardViewProps) {
const { companyId, currentUserId, path, params } = props;
return (
Dashboard for company: {companyId}
);
}
```
**Props:**
* `companyId` - The company ID
* `currentUserId` - The authenticated user
* `path` - Navigation path as array
* `params` - Query parameters
### Discover View (Optional)
For marketplace/discovery experiences where users browse content.
```tsx theme={null}
// src/views/discover-view.tsx
import React from "react";
import type { DiscoverViewProps } from "@whop/react-native";
export function DiscoverView(props: DiscoverViewProps) {
const { currentUserId, path, params } = props;
// Your discovery UI
}
```
***
## Fetching Data
### Using the Whop SDK
This still uses the deprecated SDK - we will update and changes this very soon
to be 10x better!
The Whop SDK is available out of the box for client-side data fetching:
```tsx theme={null}
import { whopSdk } from "@whop/react-native";
import { useQuery } from "@tanstack/react-query";
export function UserProfile() {
const { data: user } = useQuery({
queryKey: ["user"],
queryFn: () => whopSdk.users.getCurrentUser(),
});
return {user?.name};
}
```
We recommend using [TanStack Query](https://tanstack.com/query/latest) for
data fetching as it handles caching, loading states, and refetching
automatically.
Some SDK operations are "server only" and must be called from your API. Check
the [Quickstart](/developer/api/quickstart) for which methods require
server-side execution.
### Making Authenticated API Requests
For server-side operations, create API routes and call them from your React Native app:
Configure your API origin in the [developer dashboard](https://whop.com/dashboard/developer) under "Base URL".
 ```tsx theme={null}
// app/api/user/route.ts
import { whopSdk } from "@/lib/whop";
export async function GET(request: Request) {
const { userId } = await whopSdk.verifyUserToken(request.headers);
const user = await whopSdk.users.getUser({ userId });
return Response.json(user, { status: 200 });
}
```
See [Set up the API client](/sdk/whop-api-client) for SDK configuration.
Use the `apiOrigin` to make authenticated requests:
```tsx theme={null}
import { useQuery } from "@tanstack/react-query";
import { __internal_execSync } from "@whop/react-native";
const { apiOrigin } = __internal_execSync("getAppApiOrigin", {});
export function User() {
const { data: user, isPending } = useQuery({
queryKey: ["user"],
queryFn: () => fetch(`${apiOrigin}/api/user`).then((res) => res.json()),
});
if (isPending) return Loading...;
return {user?.name};
}
```
It's important to use the `apiOrigin` for authenticated requests. This ensures
requests go through Whop's proxy with proper authentication headers.
### Example: Check Access to an Experience
```tsx theme={null}
// Component
import { useQuery } from "@tanstack/react-query";
import { __internal_execSync } from "@whop/react-native";
const { apiOrigin } = __internal_execSync("getAppApiOrigin", {});
export function ProtectedContent({ experienceId }: { experienceId: string }) {
const { data: access, isPending } = useQuery({
queryKey: ["access", experienceId],
queryFn: () =>
fetch(`${apiOrigin}/api/access?experienceId=${experienceId}`).then(
(res) => res.json(),
),
});
if (isPending) return Loading...;
if (!access?.hasAccess) return Access Denied;
return Welcome! You have access.;
}
```
This still uses the deprecated SDK - we will update and changes this very soon
to be 10x better!
```tsx theme={null}
// app/api/access/route.ts
import { whopSdk } from "@/lib/whop";
import { NextRequest } from "next/server";
export async function GET(request: NextRequest) {
const experienceId = request.nextUrl.searchParams.get("experienceId");
if (!experienceId) {
return new Response("Experience ID required", { status: 400 });
}
const { userId } = await whopSdk.verifyUserToken(request.headers);
const access = await whopSdk.access.checkIfUserHasAccessToExperience({
experienceId,
userId,
});
return Response.json(access, { status: 200 });
}
```
***
## Styling
### Color Themes
React Native provides a `useColorScheme` hook to detect the device's color scheme. This works automatically in Whop apps:
```tsx theme={null}
import { useColorScheme } from "react-native";
export function ThemedView() {
const colorScheme = useColorScheme();
const backgroundColor = colorScheme === "dark" ? "#000" : "#fff";
return ;
}
```
### Using Radix UI Colors
For a comprehensive color system with automatic dark mode, use the `useColors` hook pattern with Radix UI colors:
```bash theme={null}
pnpm add @radix-ui/colors
```
```tsx theme={null}
// hooks/use-colors.ts
import { useColorScheme } from "react-native";
import {
gray,
grayA,
grayDark,
grayDarkA,
blue,
blueA,
blueDark,
blueDarkA,
red,
redA,
redDark,
redDarkA,
green,
greenA,
greenDark,
greenDarkA,
amber,
amberA,
amberDark,
amberDarkA,
} from "@radix-ui/colors";
export function useColors() {
const colorScheme = useColorScheme();
const isDark = colorScheme === "dark";
return {
transparent: "transparent" as const,
...(isDark ? grayDark : gray),
...(isDark ? grayDarkA : grayA),
...(isDark ? blueDark : blue),
...(isDark ? blueDarkA : blueA),
...(isDark ? redDark : red),
...(isDark ? redDarkA : redA),
...(isDark ? greenDark : green),
...(isDark ? greenDarkA : greenA),
...(isDark ? amberDark : amber),
...(isDark ? amberDarkA : amberA),
};
}
```
**Usage:**
```tsx theme={null}
export function StyledComponent() {
const colors = useColors();
return (
Themed text
);
}
```
***
## Navigation
Use the internal navigation APIs to navigate between screens and present modals:
### Navigate to a New Screen
```tsx theme={null}
import { __internal_execSync } from "@whop/react-native";
function navigateToPage() {
__internal_execSync("routerPush", {
path: ["courses", "123"],
params: { section: "intro" },
});
}
```
The `path` and `params` are passed as props to your view component.
### Go Back
```tsx theme={null}
import { __internal_execSync } from "@whop/react-native";
function goBack() {
__internal_execSync("routerPop", {});
}
```
### Present a Sheet/Modal
```tsx theme={null}
import { __internal_execSync } from "@whop/react-native";
function showModal() {
__internal_execSync("routerPresentSheet", {
path: ["modal", "settings"],
params: {},
});
}
function hideModal() {
__internal_execSync("routerDismissSheet", {});
}
```
### Get Current Route
```tsx theme={null}
import { __internal_execSync } from "@whop/react-native";
const currentRoute = __internal_execSync("routerGetCurrent", {});
console.log(currentRoute.path); // ["courses", "123"]
console.log(currentRoute.params); // { section: "intro" }
```
***
## Platform-Specific Features
### Navigation Bar
Set the navigation bar title and description:
```tsx theme={null}
import { __internal_execSync } from "@whop/react-native";
__internal_execSync("setNavigationBarData", {
title: "Course Details",
description: "Learn React Native",
});
```
### Screen Orientation
Control the screen orientation:
```tsx theme={null}
import { __internal_execSync } from "@whop/react-native";
// Lock to portrait
__internal_execSync("setScreenOrientationMode", {
targetScreenOrientationMode: "portrait",
});
// Lock to landscape
__internal_execSync("setScreenOrientationMode", {
targetScreenOrientationMode: "landscape",
});
// Allow rotation
__internal_execSync("setScreenOrientationMode", {
targetScreenOrientationMode: "rotate",
});
```
### Haptic Feedback
Provide haptic feedback on mobile devices:
```tsx theme={null}
import { Haptics } from "@whop/react-native";
async function triggerHaptic() {
await Haptics.trigger("impactMedium", {
enableVibrateFallback: true,
ignoreAndroidSystemSettings: false,
});
}
```
**Available haptic types:**
* `"selection"` - Light selection feedback
* `"impactLight"` | `"impactMedium"` | `"impactHeavy"` - Impact feedback
* `"notificationSuccess"` | `"notificationWarning"` | `"notificationError"` - Notification feedback
### Local Caching
Store data locally on the device:
```tsx theme={null}
import { __internal_execSync } from "@whop/react-native";
// Save data
__internal_execSync("cacheSet", {
key: "user_preferences",
data: JSON.stringify({ theme: "dark" }),
});
// Retrieve data
const result = __internal_execSync("cacheGet", {
key: "user_preferences",
});
const preferences = JSON.parse(result.data || "{}");
```
### Host App Details
Get information about the Whop app:
```tsx theme={null}
import { __internal_execSync } from "@whop/react-native";
const hostDetails = __internal_execSync("getHostAppDetails", {});
console.log(hostDetails.platform); // "ios" | "android" | "web"
console.log(hostDetails.version); // "1.2.3"
console.log(hostDetails.build); // "123"
console.log(hostDetails.buildType); // "appstore" | "testflight" | "debug"
```
***
## In-App Purchases
Accept payments directly within your app:
```tsx theme={null}
import { __internal_execAsync } from "@whop/react-native";
async function handlePurchase(planId: string) {
try {
const result = await __internal_execAsync("inAppPurchase", {
planId: planId,
id: "optional-checkout-config-id",
});
console.log("Payment successful!");
console.log("Session ID:", result.sessionId);
console.log("Receipt ID:", result.receiptId);
// Unlock content for user
} catch (error) {
console.error("Payment failed:", error);
}
}
```
For a complete guide on accepting payments, see the [Accept payments documentation](/developer/guides/accept-payments).
***
## Using Third-Party Libraries
Most React Native libraries work out of the box. Here are the recommended versions for common libraries:
```json theme={null}
{
"dependencies": {
"@react-native-async-storage/async-storage": "2.1.0",
"@react-native-community/netinfo": "12.0.3",
"@shopify/flash-list": "1.7.2",
"burnt": "0.13.2",
"react-native-mmkv": "3.1.0",
"react-native-safe-area-context": "5.5.2",
"react-native-screens": "4.6.0",
"react-native-svg": "15.12.0",
"react-native-gesture-handler": "2.27.2",
"react-native-reanimated": "3.18.0",
"react-native-haptic-feedback": "2.3.3",
"lottie-react-native": "7.3.2"
}
}
```
When adding new libraries, make sure they're compatible with React Native.
Some npm packages are web-only and won't work on mobile platforms.
***
## Deploying
### Build and Deploy
The `ship` command builds your app for all platforms and uploads it as a development build:
```bash theme={null}
pnpm ship
```
Build for specific platforms:
```bash theme={null}
pnpm ship --ios # iOS only
pnpm ship --android # Android only
pnpm ship --web # Web only
pnpm ship --ios --android # iOS and Android
```
The `ship` command deploys as a **development build**, which is safe to run on
existing production apps. It won't affect your live users.
### Development vs Production Builds
**Development Builds:**
* Deployed with `pnpm ship`
* Only visible when "dev mode" is enabled (shake phone)
* Safe to test without affecting production users
* Can be deployed anytime
**Production Builds:**
* Promoted from development builds via the dashboard
* Visible to all users
* Requires approval/review
* Should be thoroughly tested first
### Preview Your App
After deploying a development build, preview it on your device:
```bash theme={null}
pnpm preview
```
This generates a QR code that installs your app.
To preview development builds, you must **SHAKE YOUR PHONE** to enable "dev
mode" in the Whop app. This allows you to see non-production builds.
### Build Commands
Additional commands for managing builds:
```bash theme={null}
pnpm build # Build without uploading
pnpm upload # Upload previously built files
pnpm clean # Clean build directory
```
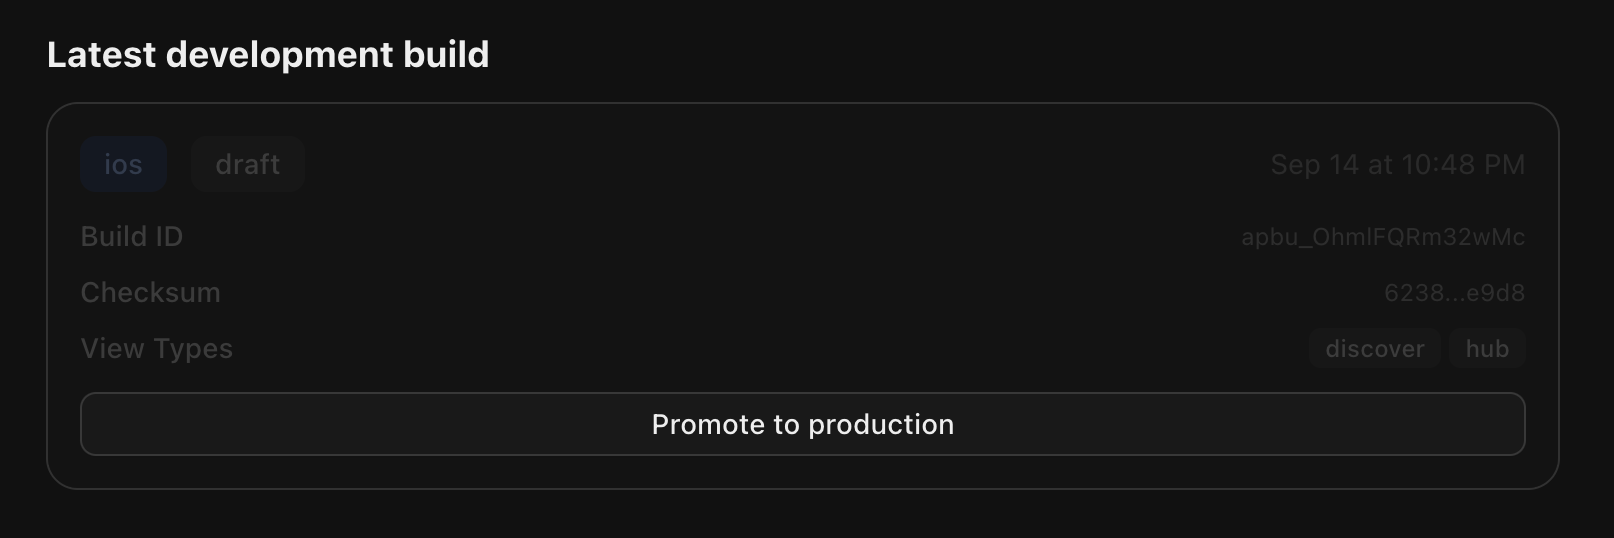
### Promoting to Production
1. Deploy a development build: `pnpm ship`
2. Test thoroughly in dev mode (shake to enable)
3. Go to your [app dashboard](https://whop.com/dashboard/developer)
4. Navigate to the Builds tab
5. Select your development build
6. Click "Promote to Production"
```tsx theme={null}
// app/api/user/route.ts
import { whopSdk } from "@/lib/whop";
export async function GET(request: Request) {
const { userId } = await whopSdk.verifyUserToken(request.headers);
const user = await whopSdk.users.getUser({ userId });
return Response.json(user, { status: 200 });
}
```
See [Set up the API client](/sdk/whop-api-client) for SDK configuration.
Use the `apiOrigin` to make authenticated requests:
```tsx theme={null}
import { useQuery } from "@tanstack/react-query";
import { __internal_execSync } from "@whop/react-native";
const { apiOrigin } = __internal_execSync("getAppApiOrigin", {});
export function User() {
const { data: user, isPending } = useQuery({
queryKey: ["user"],
queryFn: () => fetch(`${apiOrigin}/api/user`).then((res) => res.json()),
});
if (isPending) return Loading...;
return {user?.name};
}
```
It's important to use the `apiOrigin` for authenticated requests. This ensures
requests go through Whop's proxy with proper authentication headers.
### Example: Check Access to an Experience
```tsx theme={null}
// Component
import { useQuery } from "@tanstack/react-query";
import { __internal_execSync } from "@whop/react-native";
const { apiOrigin } = __internal_execSync("getAppApiOrigin", {});
export function ProtectedContent({ experienceId }: { experienceId: string }) {
const { data: access, isPending } = useQuery({
queryKey: ["access", experienceId],
queryFn: () =>
fetch(`${apiOrigin}/api/access?experienceId=${experienceId}`).then(
(res) => res.json(),
),
});
if (isPending) return Loading...;
if (!access?.hasAccess) return Access Denied;
return Welcome! You have access.;
}
```
This still uses the deprecated SDK - we will update and changes this very soon
to be 10x better!
```tsx theme={null}
// app/api/access/route.ts
import { whopSdk } from "@/lib/whop";
import { NextRequest } from "next/server";
export async function GET(request: NextRequest) {
const experienceId = request.nextUrl.searchParams.get("experienceId");
if (!experienceId) {
return new Response("Experience ID required", { status: 400 });
}
const { userId } = await whopSdk.verifyUserToken(request.headers);
const access = await whopSdk.access.checkIfUserHasAccessToExperience({
experienceId,
userId,
});
return Response.json(access, { status: 200 });
}
```
***
## Styling
### Color Themes
React Native provides a `useColorScheme` hook to detect the device's color scheme. This works automatically in Whop apps:
```tsx theme={null}
import { useColorScheme } from "react-native";
export function ThemedView() {
const colorScheme = useColorScheme();
const backgroundColor = colorScheme === "dark" ? "#000" : "#fff";
return ;
}
```
### Using Radix UI Colors
For a comprehensive color system with automatic dark mode, use the `useColors` hook pattern with Radix UI colors:
```bash theme={null}
pnpm add @radix-ui/colors
```
```tsx theme={null}
// hooks/use-colors.ts
import { useColorScheme } from "react-native";
import {
gray,
grayA,
grayDark,
grayDarkA,
blue,
blueA,
blueDark,
blueDarkA,
red,
redA,
redDark,
redDarkA,
green,
greenA,
greenDark,
greenDarkA,
amber,
amberA,
amberDark,
amberDarkA,
} from "@radix-ui/colors";
export function useColors() {
const colorScheme = useColorScheme();
const isDark = colorScheme === "dark";
return {
transparent: "transparent" as const,
...(isDark ? grayDark : gray),
...(isDark ? grayDarkA : grayA),
...(isDark ? blueDark : blue),
...(isDark ? blueDarkA : blueA),
...(isDark ? redDark : red),
...(isDark ? redDarkA : redA),
...(isDark ? greenDark : green),
...(isDark ? greenDarkA : greenA),
...(isDark ? amberDark : amber),
...(isDark ? amberDarkA : amberA),
};
}
```
**Usage:**
```tsx theme={null}
export function StyledComponent() {
const colors = useColors();
return (
Themed text
);
}
```
***
## Navigation
Use the internal navigation APIs to navigate between screens and present modals:
### Navigate to a New Screen
```tsx theme={null}
import { __internal_execSync } from "@whop/react-native";
function navigateToPage() {
__internal_execSync("routerPush", {
path: ["courses", "123"],
params: { section: "intro" },
});
}
```
The `path` and `params` are passed as props to your view component.
### Go Back
```tsx theme={null}
import { __internal_execSync } from "@whop/react-native";
function goBack() {
__internal_execSync("routerPop", {});
}
```
### Present a Sheet/Modal
```tsx theme={null}
import { __internal_execSync } from "@whop/react-native";
function showModal() {
__internal_execSync("routerPresentSheet", {
path: ["modal", "settings"],
params: {},
});
}
function hideModal() {
__internal_execSync("routerDismissSheet", {});
}
```
### Get Current Route
```tsx theme={null}
import { __internal_execSync } from "@whop/react-native";
const currentRoute = __internal_execSync("routerGetCurrent", {});
console.log(currentRoute.path); // ["courses", "123"]
console.log(currentRoute.params); // { section: "intro" }
```
***
## Platform-Specific Features
### Navigation Bar
Set the navigation bar title and description:
```tsx theme={null}
import { __internal_execSync } from "@whop/react-native";
__internal_execSync("setNavigationBarData", {
title: "Course Details",
description: "Learn React Native",
});
```
### Screen Orientation
Control the screen orientation:
```tsx theme={null}
import { __internal_execSync } from "@whop/react-native";
// Lock to portrait
__internal_execSync("setScreenOrientationMode", {
targetScreenOrientationMode: "portrait",
});
// Lock to landscape
__internal_execSync("setScreenOrientationMode", {
targetScreenOrientationMode: "landscape",
});
// Allow rotation
__internal_execSync("setScreenOrientationMode", {
targetScreenOrientationMode: "rotate",
});
```
### Haptic Feedback
Provide haptic feedback on mobile devices:
```tsx theme={null}
import { Haptics } from "@whop/react-native";
async function triggerHaptic() {
await Haptics.trigger("impactMedium", {
enableVibrateFallback: true,
ignoreAndroidSystemSettings: false,
});
}
```
**Available haptic types:**
* `"selection"` - Light selection feedback
* `"impactLight"` | `"impactMedium"` | `"impactHeavy"` - Impact feedback
* `"notificationSuccess"` | `"notificationWarning"` | `"notificationError"` - Notification feedback
### Local Caching
Store data locally on the device:
```tsx theme={null}
import { __internal_execSync } from "@whop/react-native";
// Save data
__internal_execSync("cacheSet", {
key: "user_preferences",
data: JSON.stringify({ theme: "dark" }),
});
// Retrieve data
const result = __internal_execSync("cacheGet", {
key: "user_preferences",
});
const preferences = JSON.parse(result.data || "{}");
```
### Host App Details
Get information about the Whop app:
```tsx theme={null}
import { __internal_execSync } from "@whop/react-native";
const hostDetails = __internal_execSync("getHostAppDetails", {});
console.log(hostDetails.platform); // "ios" | "android" | "web"
console.log(hostDetails.version); // "1.2.3"
console.log(hostDetails.build); // "123"
console.log(hostDetails.buildType); // "appstore" | "testflight" | "debug"
```
***
## In-App Purchases
Accept payments directly within your app:
```tsx theme={null}
import { __internal_execAsync } from "@whop/react-native";
async function handlePurchase(planId: string) {
try {
const result = await __internal_execAsync("inAppPurchase", {
planId: planId,
id: "optional-checkout-config-id",
});
console.log("Payment successful!");
console.log("Session ID:", result.sessionId);
console.log("Receipt ID:", result.receiptId);
// Unlock content for user
} catch (error) {
console.error("Payment failed:", error);
}
}
```
For a complete guide on accepting payments, see the [Accept payments documentation](/developer/guides/accept-payments).
***
## Using Third-Party Libraries
Most React Native libraries work out of the box. Here are the recommended versions for common libraries:
```json theme={null}
{
"dependencies": {
"@react-native-async-storage/async-storage": "2.1.0",
"@react-native-community/netinfo": "12.0.3",
"@shopify/flash-list": "1.7.2",
"burnt": "0.13.2",
"react-native-mmkv": "3.1.0",
"react-native-safe-area-context": "5.5.2",
"react-native-screens": "4.6.0",
"react-native-svg": "15.12.0",
"react-native-gesture-handler": "2.27.2",
"react-native-reanimated": "3.18.0",
"react-native-haptic-feedback": "2.3.3",
"lottie-react-native": "7.3.2"
}
}
```
When adding new libraries, make sure they're compatible with React Native.
Some npm packages are web-only and won't work on mobile platforms.
***
## Deploying
### Build and Deploy
The `ship` command builds your app for all platforms and uploads it as a development build:
```bash theme={null}
pnpm ship
```
Build for specific platforms:
```bash theme={null}
pnpm ship --ios # iOS only
pnpm ship --android # Android only
pnpm ship --web # Web only
pnpm ship --ios --android # iOS and Android
```
The `ship` command deploys as a **development build**, which is safe to run on
existing production apps. It won't affect your live users.
### Development vs Production Builds
**Development Builds:**
* Deployed with `pnpm ship`
* Only visible when "dev mode" is enabled (shake phone)
* Safe to test without affecting production users
* Can be deployed anytime
**Production Builds:**
* Promoted from development builds via the dashboard
* Visible to all users
* Requires approval/review
* Should be thoroughly tested first
### Preview Your App
After deploying a development build, preview it on your device:
```bash theme={null}
pnpm preview
```
This generates a QR code that installs your app.
To preview development builds, you must **SHAKE YOUR PHONE** to enable "dev
mode" in the Whop app. This allows you to see non-production builds.
### Build Commands
Additional commands for managing builds:
```bash theme={null}
pnpm build # Build without uploading
pnpm upload # Upload previously built files
pnpm clean # Clean build directory
```
### Promoting to Production
1. Deploy a development build: `pnpm ship`
2. Test thoroughly in dev mode (shake to enable)
3. Go to your [app dashboard](https://whop.com/dashboard/developer)
4. Navigate to the Builds tab
5. Select your development build
6. Click "Promote to Production"
 Your app will be reviewed and deployed to all users once approved.
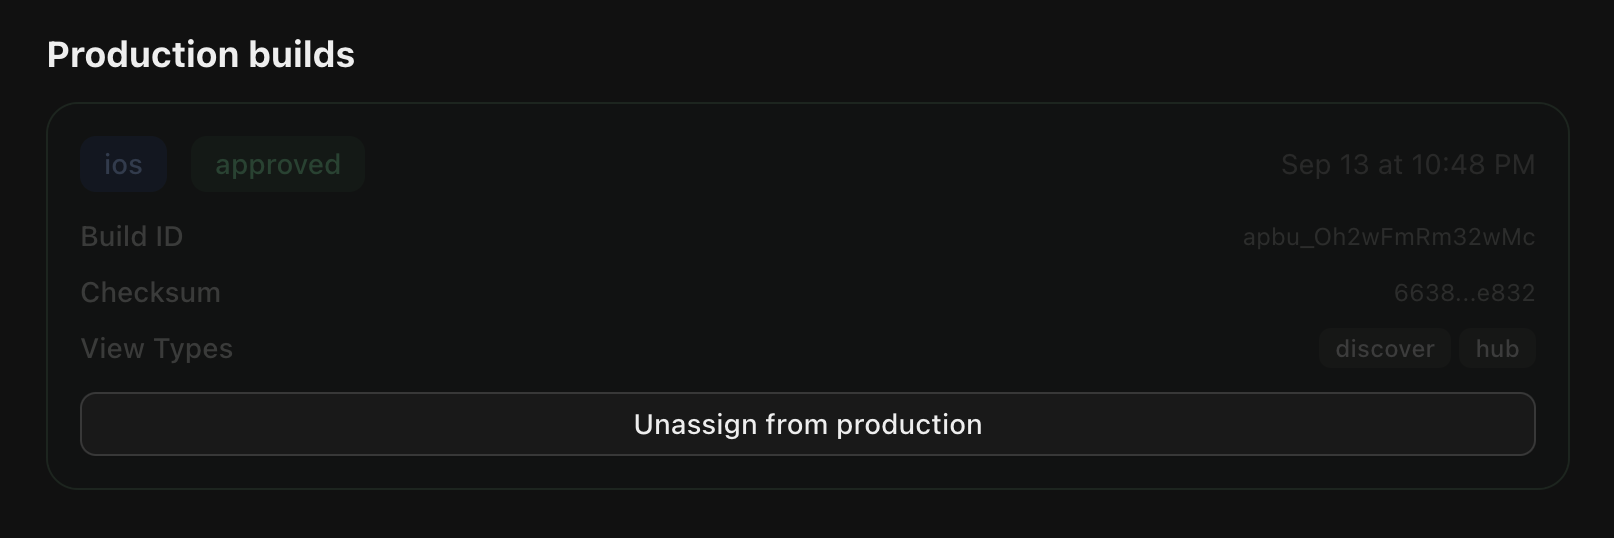
### Rollback
From the builds screen you can also instantly rollback to a previous production build which will be pushed live to all users across Whop.
Your app will be reviewed and deployed to all users once approved.
### Rollback
From the builds screen you can also instantly rollback to a previous production build which will be pushed live to all users across Whop.
 ***
## CLI Reference
The `@whop/react-native` CLI provides commands for building and deploying your app:
### Commands
```bash theme={null}
pnpm ship [--ios] [--android] [--web] # Build + upload development build
pnpm build [--ios] [--android] [--web] # Build only (no upload)
pnpm upload [--ios] [--android] [--web] # Upload existing build/
pnpm clean # Clean build directory
pnpm preview # Generate install QR code
```
### Build Process
When you run `pnpm ship`, the CLI:
1. **Generates Entrypoints** - Creates platform-specific entry files that register your views
2. **Bundles Code**:
* **Mobile (iOS/Android)**: Uses Metro bundler + Hermes bytecode compiler
* **Web**: Uses esbuild with React Native Web aliases
3. **Packages Assets** - Collects and optimizes images and other assets
4. **Uploads to Whop** - Creates a development build in your app dashboard
5. **Generates Install Link** - Provides QR code for testing
### Build Output
```
build/
├── entrypoints/ # Generated entry files
│ ├── ios/
│ ├── android/
│ └── web/
├── output/ # Compiled bundles
│ ├── ios/
│ │ └── main_js_bundle.hbc
│ ├── android/
│ │ └── main_js_bundle.hbc
│ └── web/
│ ├── main.js
│ └── index.html
└── app_build_*.zip # Packaged builds
```
***
## Troubleshooting
### Development Build Not Showing
**Problem**: You deployed a development build but can't see it in the app.
**Solution**: Shake your phone to enable "dev mode". Development builds are only visible when dev mode is active.
### Build Failures
**Problem**: Build fails with Metro or esbuild errors.
**Solutions**:
* Run `pnpm clean` to clear build cache
* Check that all dependencies are installed: `pnpm install`
* Verify Node.js version: `node -v` (should be 22+)
* Check for syntax errors in your views
### API Requests Not Working
**Problem**: API requests return 401 or authentication errors.
**Solutions**:
* Verify you're using `apiOrigin` from `__internal_execSync("getAppApiOrigin", {})`
* Check that `WHOP_API_KEY` is set in `.env.local`
* Ensure your API endpoint calls `whopSdk.verifyUserToken(request.headers)`
* Verify the Base URL is set correctly in the dashboard
### Views Not Found
**Problem**: Build succeeds but views don't render.
**Solutions**:
* Check that view files exist in `src/views/`
* Verify exports match: `export function ExperienceView(props: ExperienceViewProps)`
* Make sure view files end with `.tsx` or `.jsx`
### Libraries Not Working
**Problem**: Third-party library causes crashes on mobile.
**Solutions**:
* Verify the library supports React Native (not just web)
* Use recommended versions from the [Using Libraries](#using-third-party-libraries) section
* Check if the library requires native modules (if so and not in recommended, it is not supported)
### Platform-Specific Issues
**Problem**: App works on one platform but not another.
**Solutions**:
* Use `Platform.OS` to detect platform and provide fallbacks
* Test on all platforms before promoting to production
* Check if you're using platform-specific APIs incorrectly
***
## Next Steps
* [Set up authentication](/developer/guides/authentication) for your API routes
* [Accept payments](/developer/guides/accept-payments) with in-app purchases
* [Use webhooks](/developer/guides/webhooks) to handle events
* Explore the [SDK reference](/developer/api/getting-started) for available APIs
***
## CLI Reference
The `@whop/react-native` CLI provides commands for building and deploying your app:
### Commands
```bash theme={null}
pnpm ship [--ios] [--android] [--web] # Build + upload development build
pnpm build [--ios] [--android] [--web] # Build only (no upload)
pnpm upload [--ios] [--android] [--web] # Upload existing build/
pnpm clean # Clean build directory
pnpm preview # Generate install QR code
```
### Build Process
When you run `pnpm ship`, the CLI:
1. **Generates Entrypoints** - Creates platform-specific entry files that register your views
2. **Bundles Code**:
* **Mobile (iOS/Android)**: Uses Metro bundler + Hermes bytecode compiler
* **Web**: Uses esbuild with React Native Web aliases
3. **Packages Assets** - Collects and optimizes images and other assets
4. **Uploads to Whop** - Creates a development build in your app dashboard
5. **Generates Install Link** - Provides QR code for testing
### Build Output
```
build/
├── entrypoints/ # Generated entry files
│ ├── ios/
│ ├── android/
│ └── web/
├── output/ # Compiled bundles
│ ├── ios/
│ │ └── main_js_bundle.hbc
│ ├── android/
│ │ └── main_js_bundle.hbc
│ └── web/
│ ├── main.js
│ └── index.html
└── app_build_*.zip # Packaged builds
```
***
## Troubleshooting
### Development Build Not Showing
**Problem**: You deployed a development build but can't see it in the app.
**Solution**: Shake your phone to enable "dev mode". Development builds are only visible when dev mode is active.
### Build Failures
**Problem**: Build fails with Metro or esbuild errors.
**Solutions**:
* Run `pnpm clean` to clear build cache
* Check that all dependencies are installed: `pnpm install`
* Verify Node.js version: `node -v` (should be 22+)
* Check for syntax errors in your views
### API Requests Not Working
**Problem**: API requests return 401 or authentication errors.
**Solutions**:
* Verify you're using `apiOrigin` from `__internal_execSync("getAppApiOrigin", {})`
* Check that `WHOP_API_KEY` is set in `.env.local`
* Ensure your API endpoint calls `whopSdk.verifyUserToken(request.headers)`
* Verify the Base URL is set correctly in the dashboard
### Views Not Found
**Problem**: Build succeeds but views don't render.
**Solutions**:
* Check that view files exist in `src/views/`
* Verify exports match: `export function ExperienceView(props: ExperienceViewProps)`
* Make sure view files end with `.tsx` or `.jsx`
### Libraries Not Working
**Problem**: Third-party library causes crashes on mobile.
**Solutions**:
* Verify the library supports React Native (not just web)
* Use recommended versions from the [Using Libraries](#using-third-party-libraries) section
* Check if the library requires native modules (if so and not in recommended, it is not supported)
### Platform-Specific Issues
**Problem**: App works on one platform but not another.
**Solutions**:
* Use `Platform.OS` to detect platform and provide fallbacks
* Test on all platforms before promoting to production
* Check if you're using platform-specific APIs incorrectly
***
## Next Steps
* [Set up authentication](/developer/guides/authentication) for your API routes
* [Accept payments](/developer/guides/accept-payments) with in-app purchases
* [Use webhooks](/developer/guides/webhooks) to handle events
* Explore the [SDK reference](/developer/api/getting-started) for available APIs