> ## Documentation Index
> Fetch the complete documentation index at: https://docs.whop.com/llms.txt
> Use this file to discover all available pages before exploring further.
# Quickstart
> Create your Whop account, find the dashboard, get an API key, make your first SDK call, and test a webhook.
Use this page the first time you connect Whop to your app or backend. You'll sign up, open the dashboard, create an API key, install the SDK, make your first call, and watch a webhook land on your server.
Keep `WHOP_API_KEY` on your server. Do not put Account API keys in browser code, mobile apps, or public repositories.
## Set up your account
Go to [whop.com/new](https://whop.com/new) and create your Whop account. The onboarding flow creates your first business, which is the Account that owns API keys, products, webhooks, and payments.
After onboarding, open [whop.com/dashboard](https://whop.com/dashboard). If you have more than one business, choose the one you want to build against from the business switcher.
Click **Dashboard ↗** in the top-right corner of these docs to open your developer dashboard directly.
## Create an API key
For the quickest path, create an Account API key. Use this when your server acts on behalf of your own business.
Building a Whop App? Learn when to use [App API keys](/developer/api/getting-started#app-api-keys) and [OAuth tokens](/developer/guides/oauth).
In **Account API Keys**, click **Create**. Name the key something you can recognize later, like `Local development` or `Production payments`.
For the first SDK call below, use the Admin role or grant the read permissions listed on [Retrieve Requesting Account](/api-reference/beta/accounts/retrieve-requesting-account). For production, switch to a narrower custom permission set once you know exactly which endpoints you use.
Copy the key when Whop shows it. Store it in your local `.env` file as `WHOP_API_KEY`.
 ## Install the SDK
```bash TypeScript theme={null}
pnpm add @whop/sdk
```
```bash Python theme={null}
pip install whop-sdk
```
```bash Ruby theme={null}
gem install whop_sdk
```
Add your credentials to `.env`:
```bash theme={null}
WHOP_API_KEY=whop_xxxxxxxxxxxxxxxxx
```
## Make your first call
Retrieve the Account tied to your API key. This confirms your key and permissions are wired correctly and prints your Account ID, which starts with `biz_`.
```typescript TypeScript theme={null}
import Whop from "@whop/sdk";
const apiKey = process.env.WHOP_API_KEY;
if (!apiKey) {
throw new Error("Set WHOP_API_KEY");
}
const client = new Whop({
apiKey,
});
const account = await client.accounts.me();
console.log(account.id);
```
```python Python theme={null}
import os
from whop_sdk import Whop
client = Whop(
api_key=os.environ["WHOP_API_KEY"],
)
account = client.accounts.me()
print(account.id)
```
```ruby Ruby theme={null}
require "whop_sdk"
whop = WhopSDK::Client.new(
api_key: ENV.fetch("WHOP_API_KEY"),
)
account = whop.accounts.me
puts account.id
```
## See a webhook
Whop sends a webhook to your server when something happens in your business, like `payment.succeeded` or `membership.activated`.
Add a `POST` endpoint in your app and expose it with ngrok, Cloudflare Tunnel, or another HTTPS tunnel while developing.
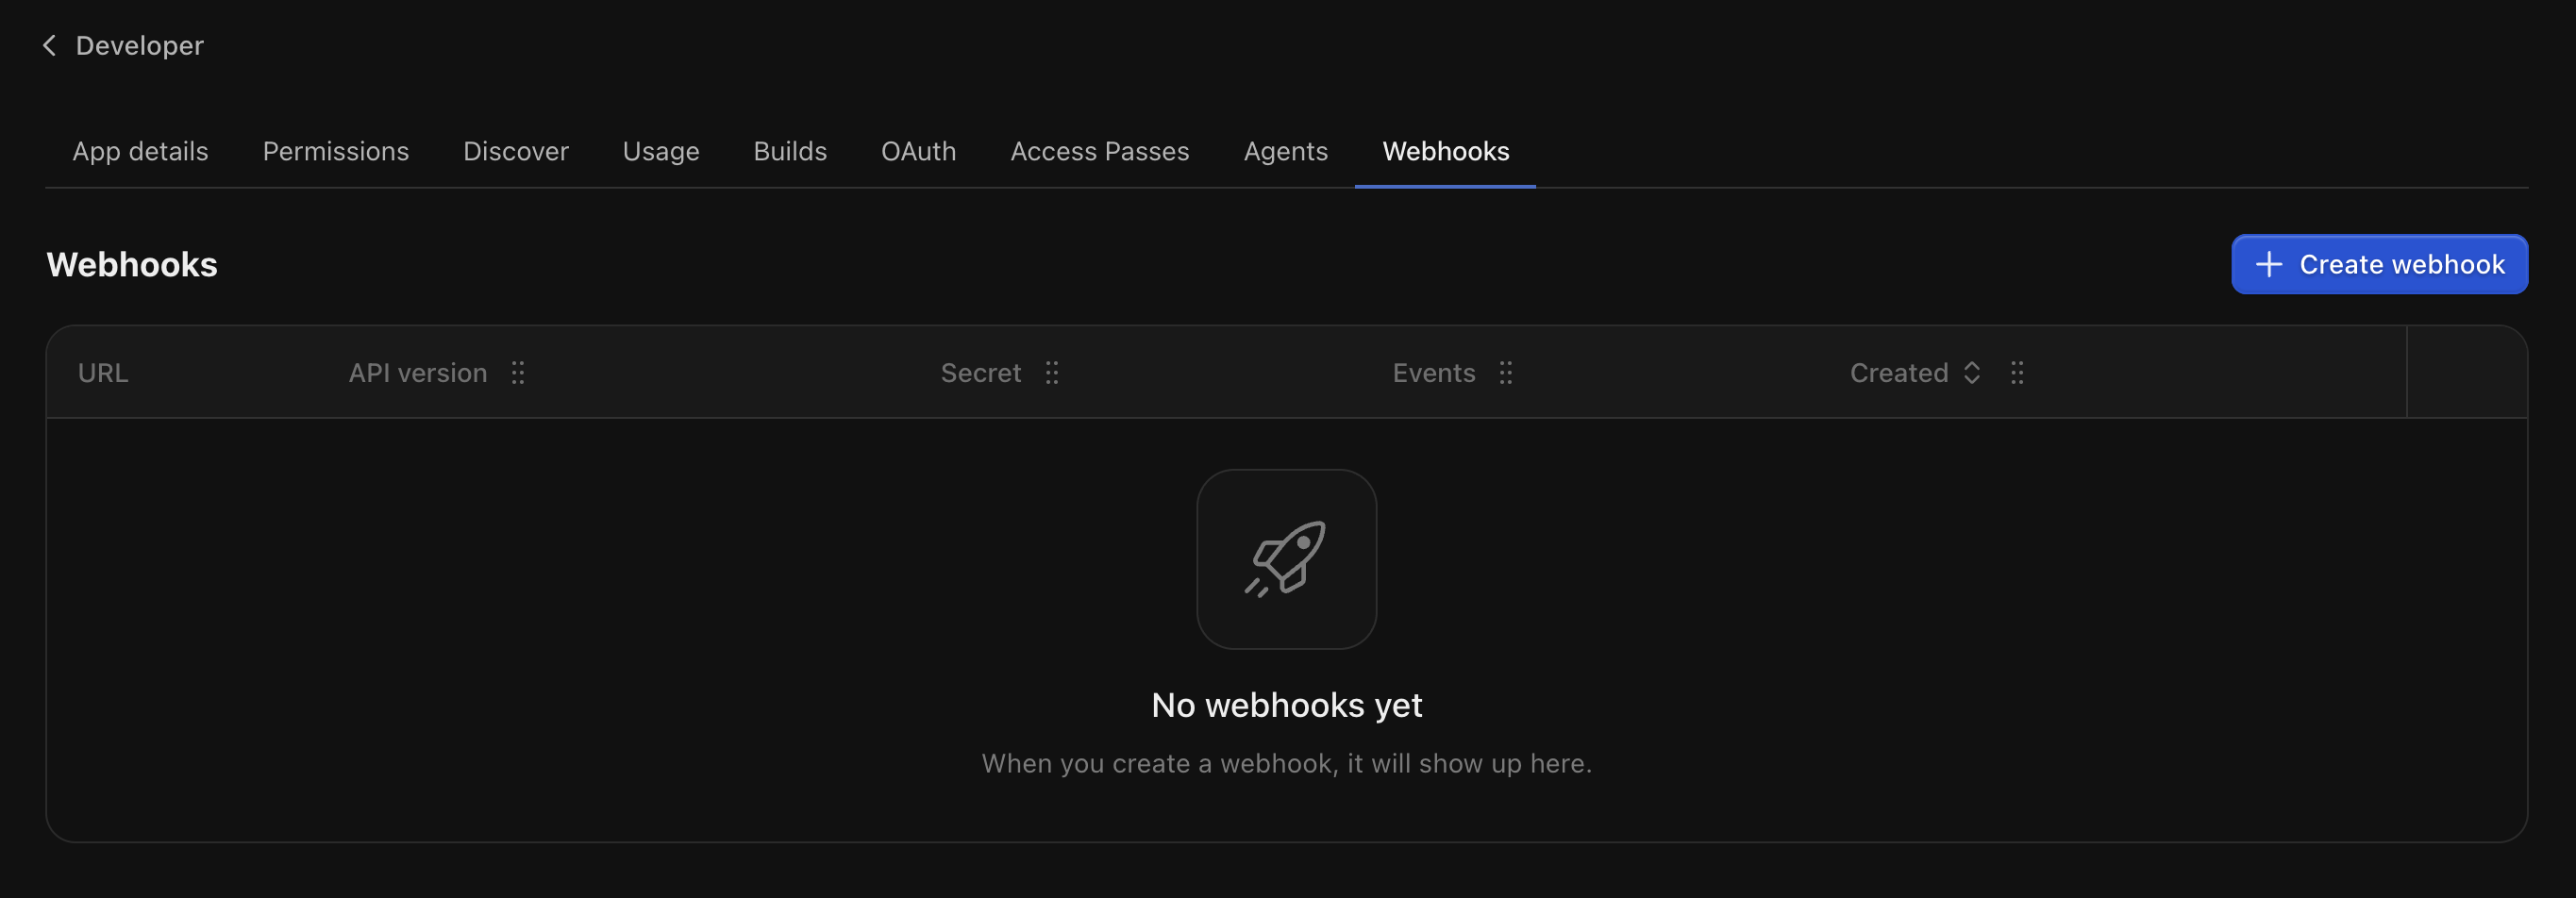
Open **Developer > Webhooks**, then click **Create webhook**.
## Install the SDK
```bash TypeScript theme={null}
pnpm add @whop/sdk
```
```bash Python theme={null}
pip install whop-sdk
```
```bash Ruby theme={null}
gem install whop_sdk
```
Add your credentials to `.env`:
```bash theme={null}
WHOP_API_KEY=whop_xxxxxxxxxxxxxxxxx
```
## Make your first call
Retrieve the Account tied to your API key. This confirms your key and permissions are wired correctly and prints your Account ID, which starts with `biz_`.
```typescript TypeScript theme={null}
import Whop from "@whop/sdk";
const apiKey = process.env.WHOP_API_KEY;
if (!apiKey) {
throw new Error("Set WHOP_API_KEY");
}
const client = new Whop({
apiKey,
});
const account = await client.accounts.me();
console.log(account.id);
```
```python Python theme={null}
import os
from whop_sdk import Whop
client = Whop(
api_key=os.environ["WHOP_API_KEY"],
)
account = client.accounts.me()
print(account.id)
```
```ruby Ruby theme={null}
require "whop_sdk"
whop = WhopSDK::Client.new(
api_key: ENV.fetch("WHOP_API_KEY"),
)
account = whop.accounts.me
puts account.id
```
## See a webhook
Whop sends a webhook to your server when something happens in your business, like `payment.succeeded` or `membership.activated`.
Add a `POST` endpoint in your app and expose it with ngrok, Cloudflare Tunnel, or another HTTPS tunnel while developing.
Open **Developer > Webhooks**, then click **Create webhook**.
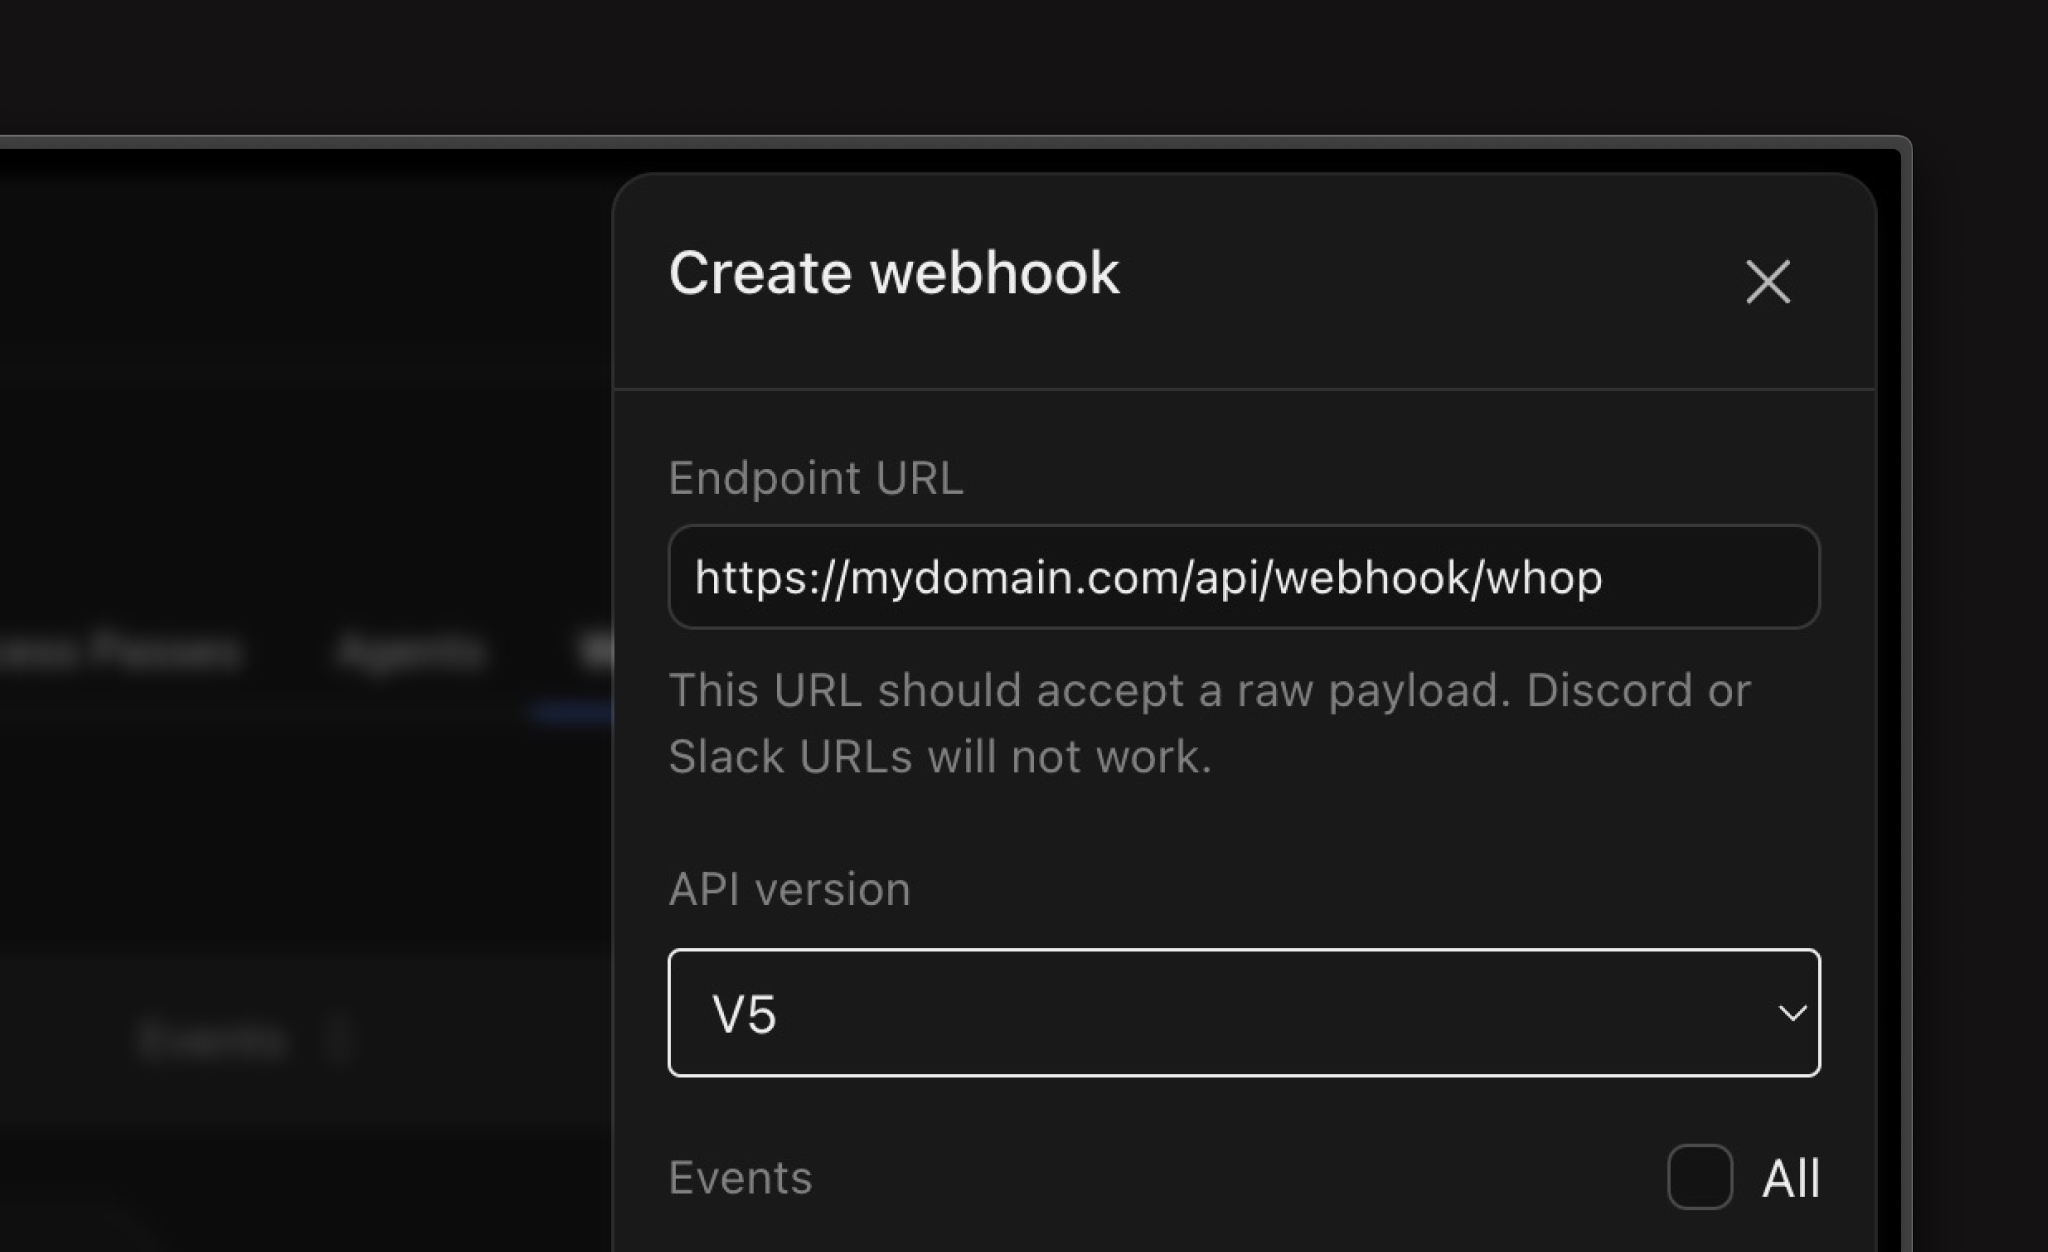
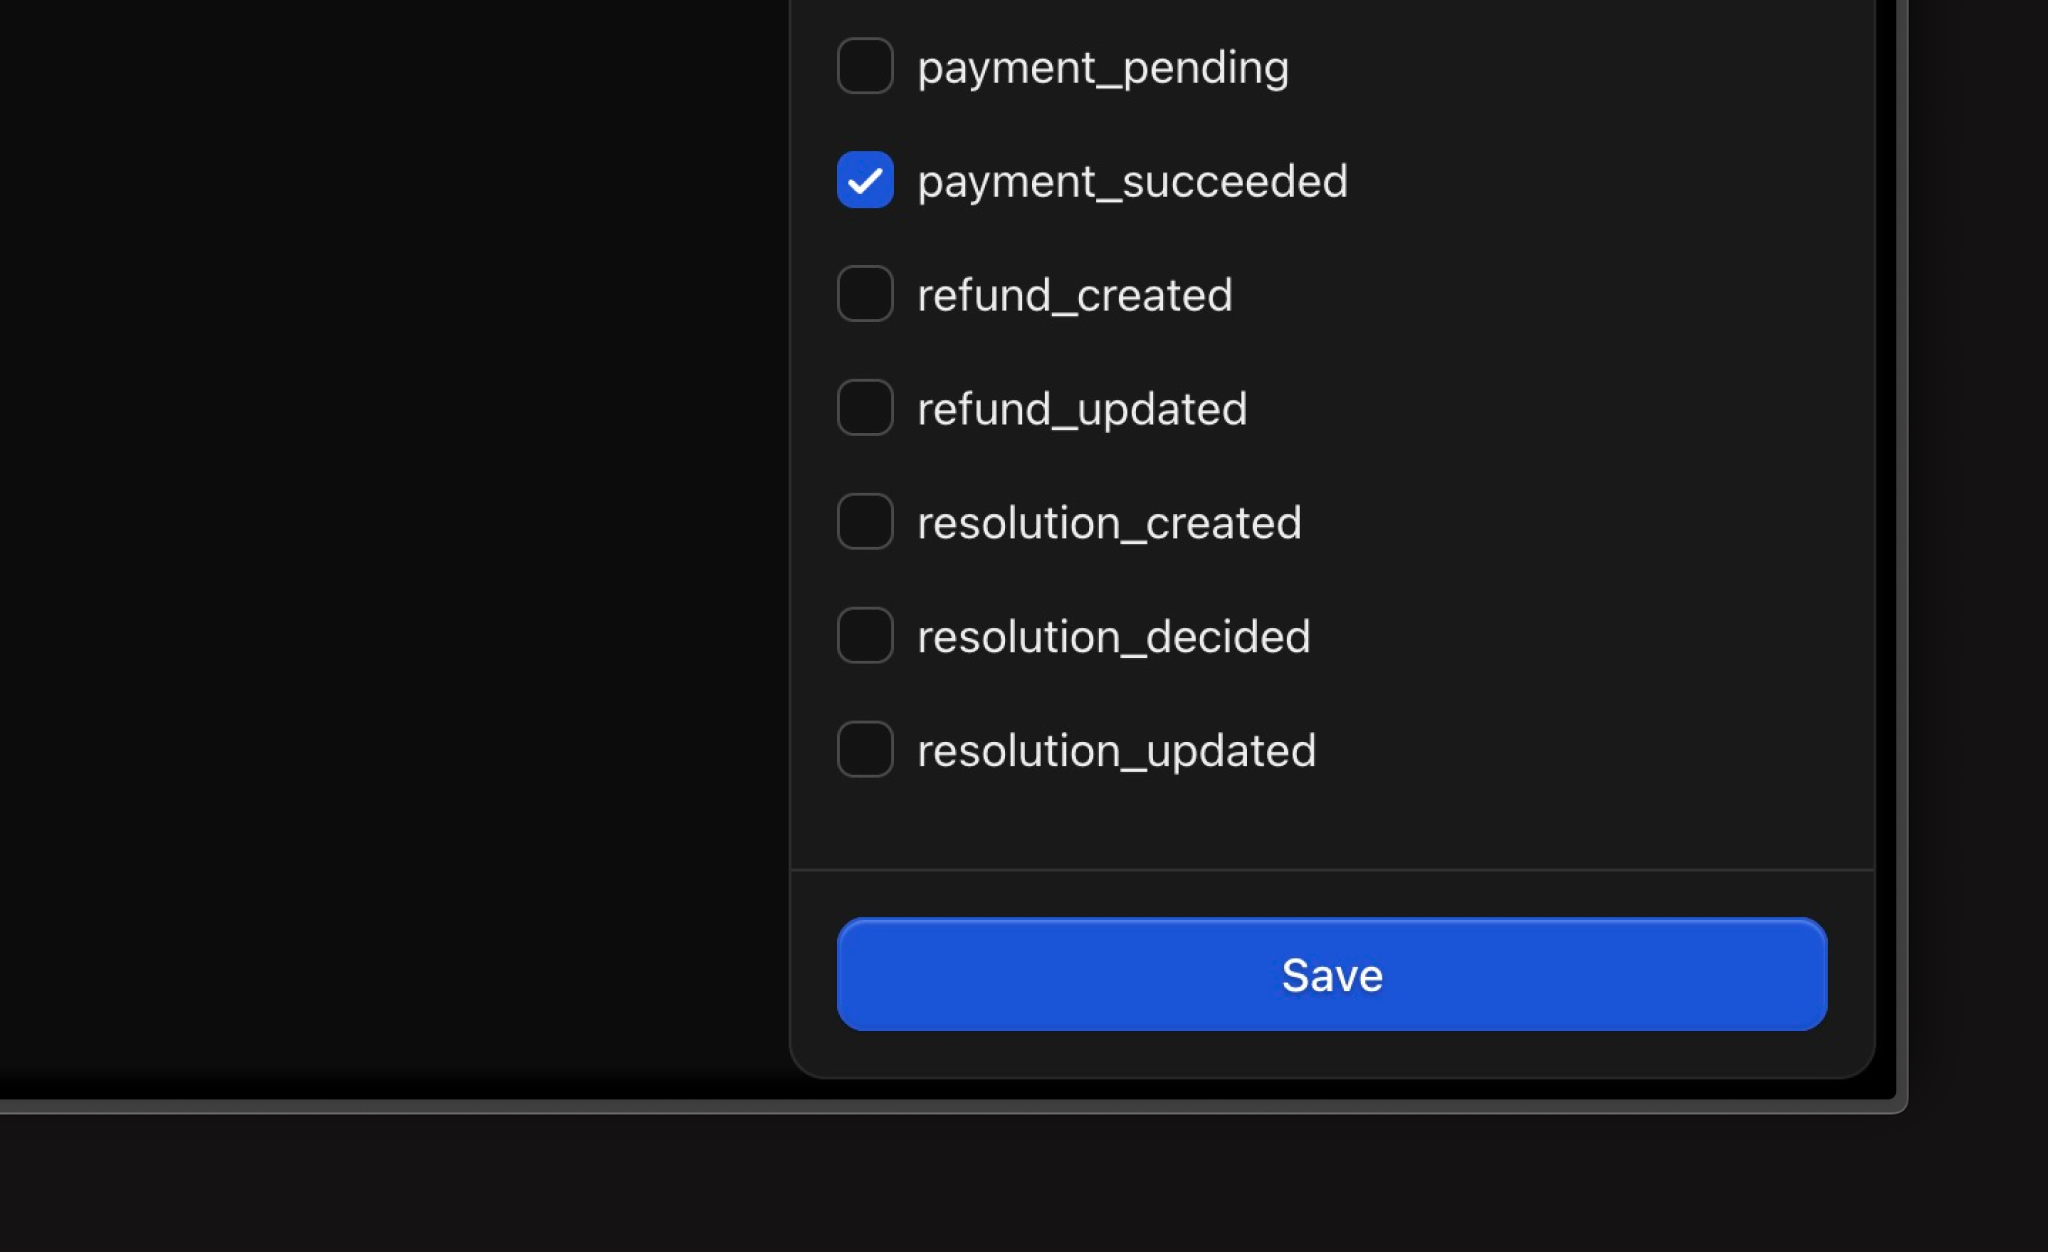
 Paste your HTTPS endpoint, keep the API version on `v1`, and select the events you want to receive.
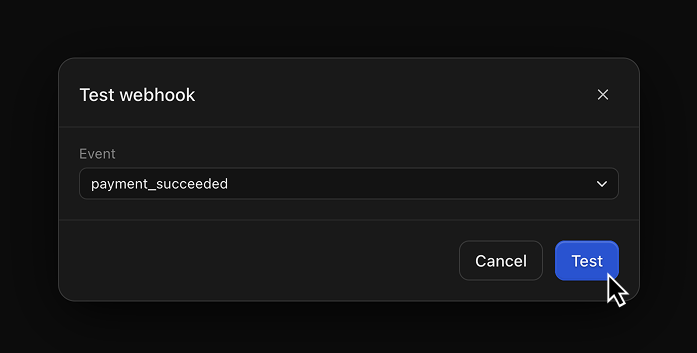
 Use the webhook row actions to send a test event. When your server logs the request, your setup is complete.
 ## Next steps
Create checkout links or embedded checkout flows.
Verify signatures and handle payment events safely.
Explore endpoints, SDK examples, and required permissions.
## Next steps
Create checkout links or embedded checkout flows.
Verify signatures and handle payment events safely.
Explore endpoints, SDK examples, and required permissions.